Magical Memory
Magical Memory is a tangible interactive game for users to experience being a wizard and solve puzzles by magic and wisdom, proceeding with a touching storyline and successive stages. Players are expected to utilize clues from props and stories and use the magic wand and spell to seek hidden answers step by step.
The project followed Hornecker and Burr's (2006) tangible interaction framework and use various hardware, sensors, AI voice recognition technology, and real game setting, to bring users immersive and interesting experiences.
Individual Project | 2021.02
#Tangible #Interaction #PuzzleGame #Storytelling #Hardware #AI #Prototyping

Introduction
My inspiration came from Harry Potter. Many people have fantasies about controlling things by magic and spells as brave and wise wizards. To build a more immersive, interesting, and interactive experience, we intended to utilize narrative elements and real settings and props to design a tangible puzzle game.
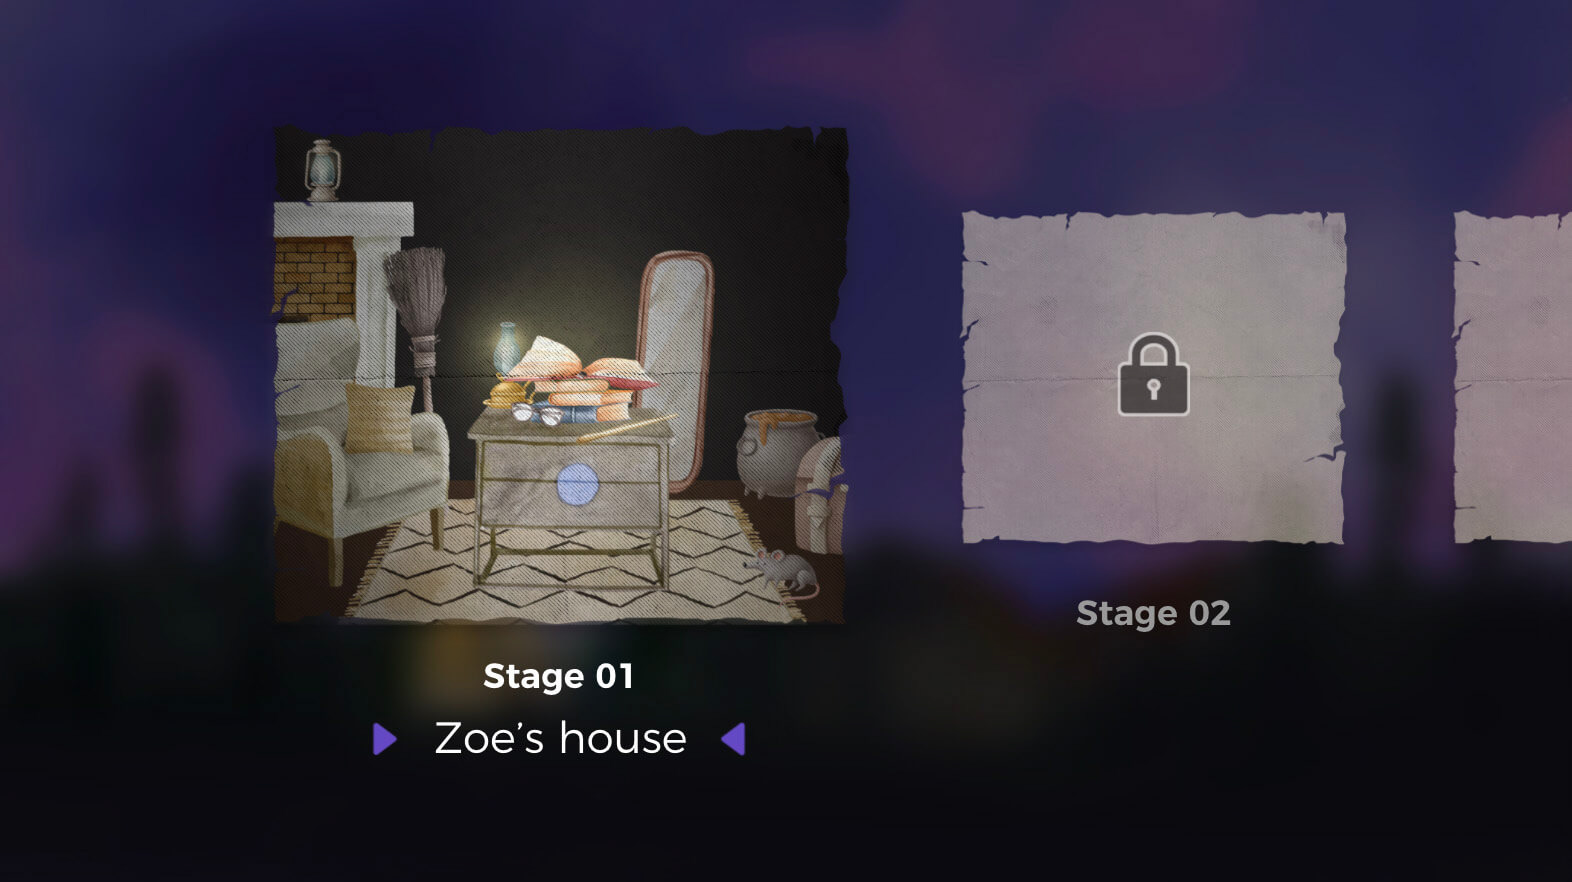
In a nutshell, <Magical Memory> is a tangible interactive game for users to use 'magic', i.e. wand waving (specific gestures) and spells (speech) to solve puzzles step by step in the real mini settings with reference to the clues from props and stories; the game has a warm and tender storyline and several scenes, and the following introductions are about the level 1. After passing each level, users will get a corner of the map to find the final destination.
The game mainly includes six props and they were related to each other with a sequence. Users have to find clues to know what is the next step and what magics should be used.
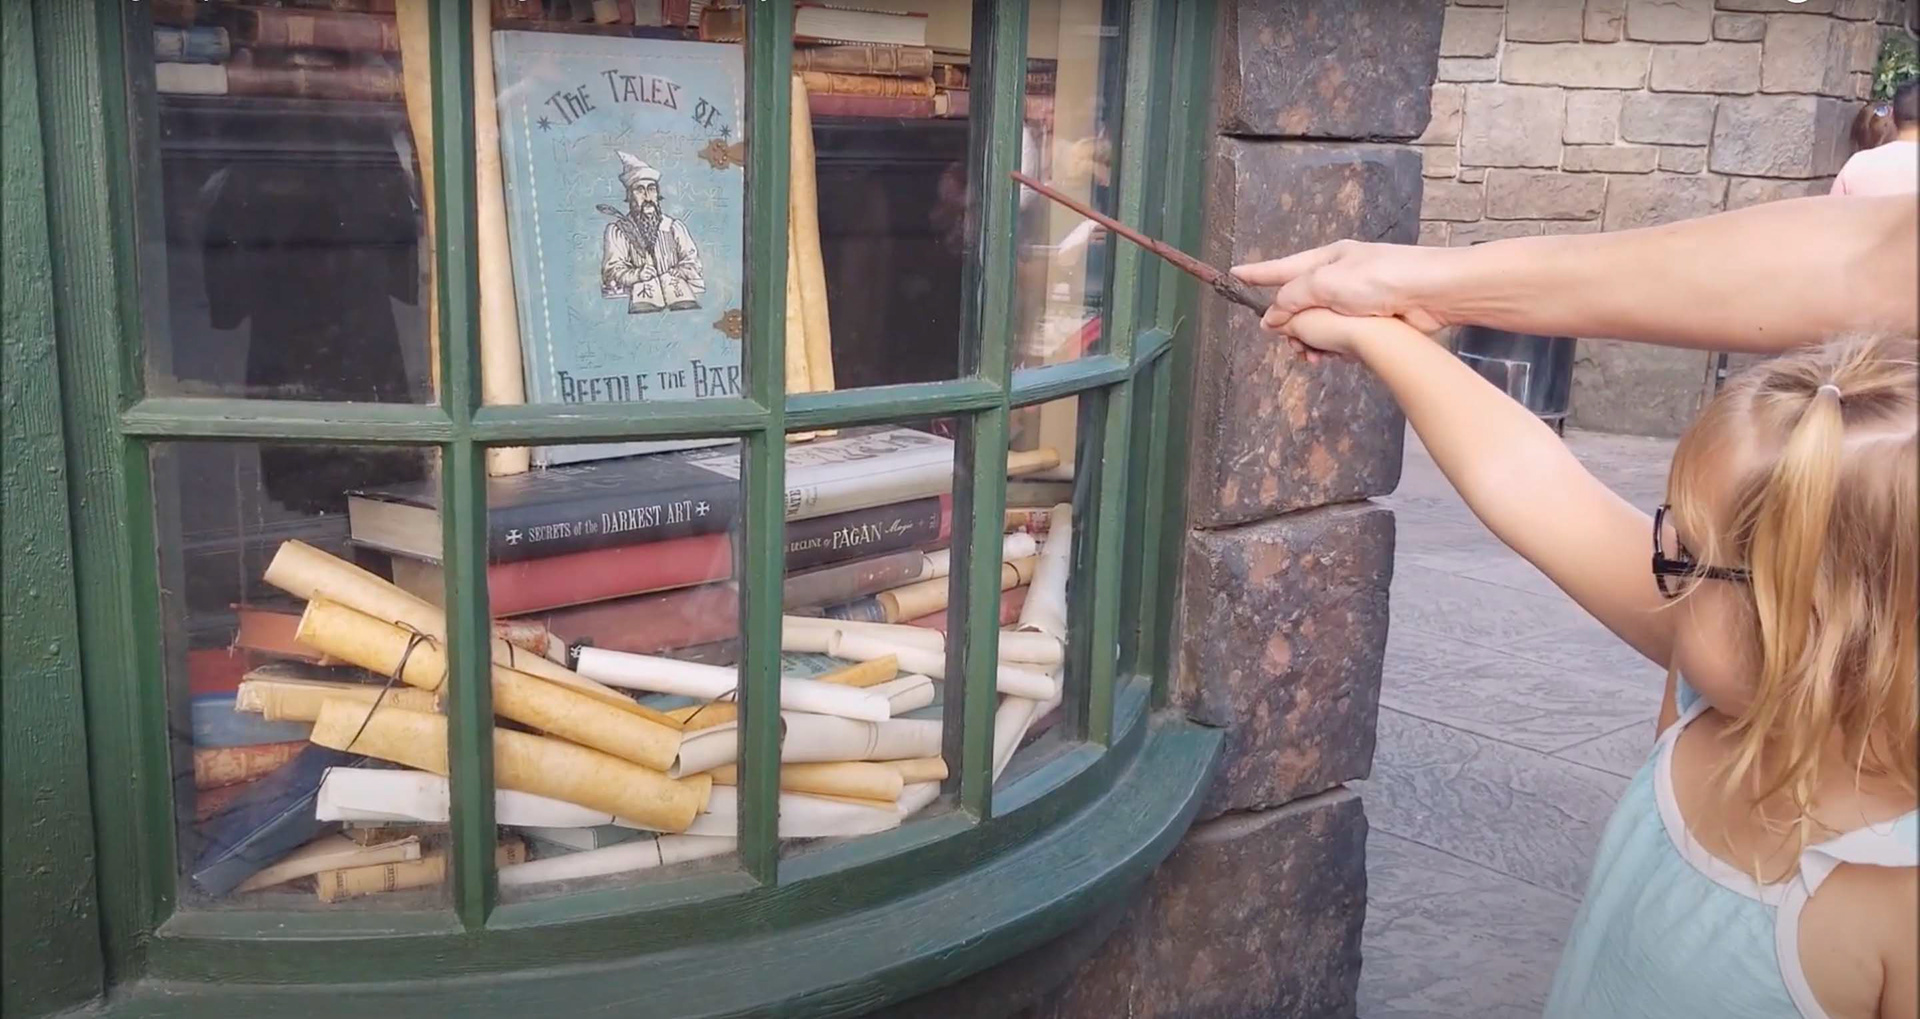
Inspiration - The Wizarding World of Harry Potter at Universal. Tourists can use wands and gestures to trigger movements/effects.
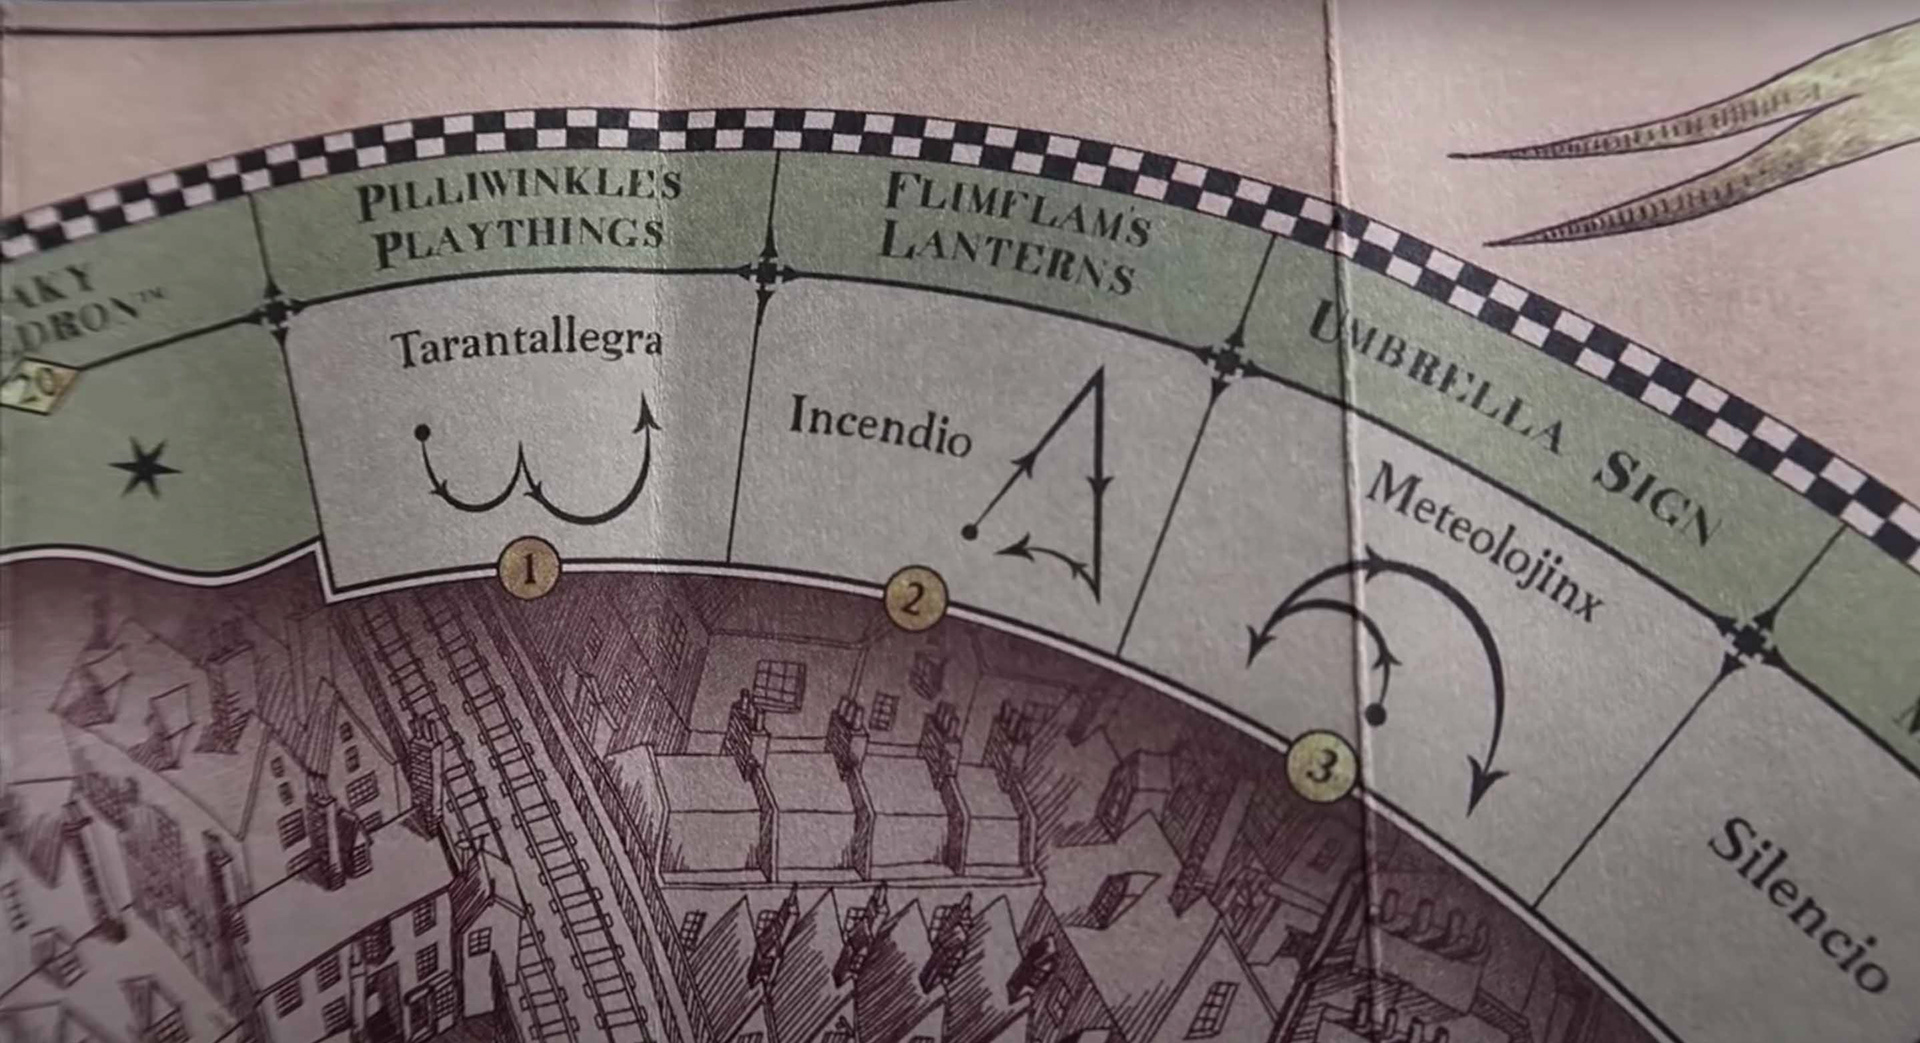
Inspiration - The Wizarding World of Harry Potter at Universal. Provided map and spells.
Tangible Interaction Framework
Hornecker and Burr (2006) have proposed the Tangible Interaction Framework with themes and concepts. We ideated our project concept and possible characteristics with reference to this framework.

Game Design
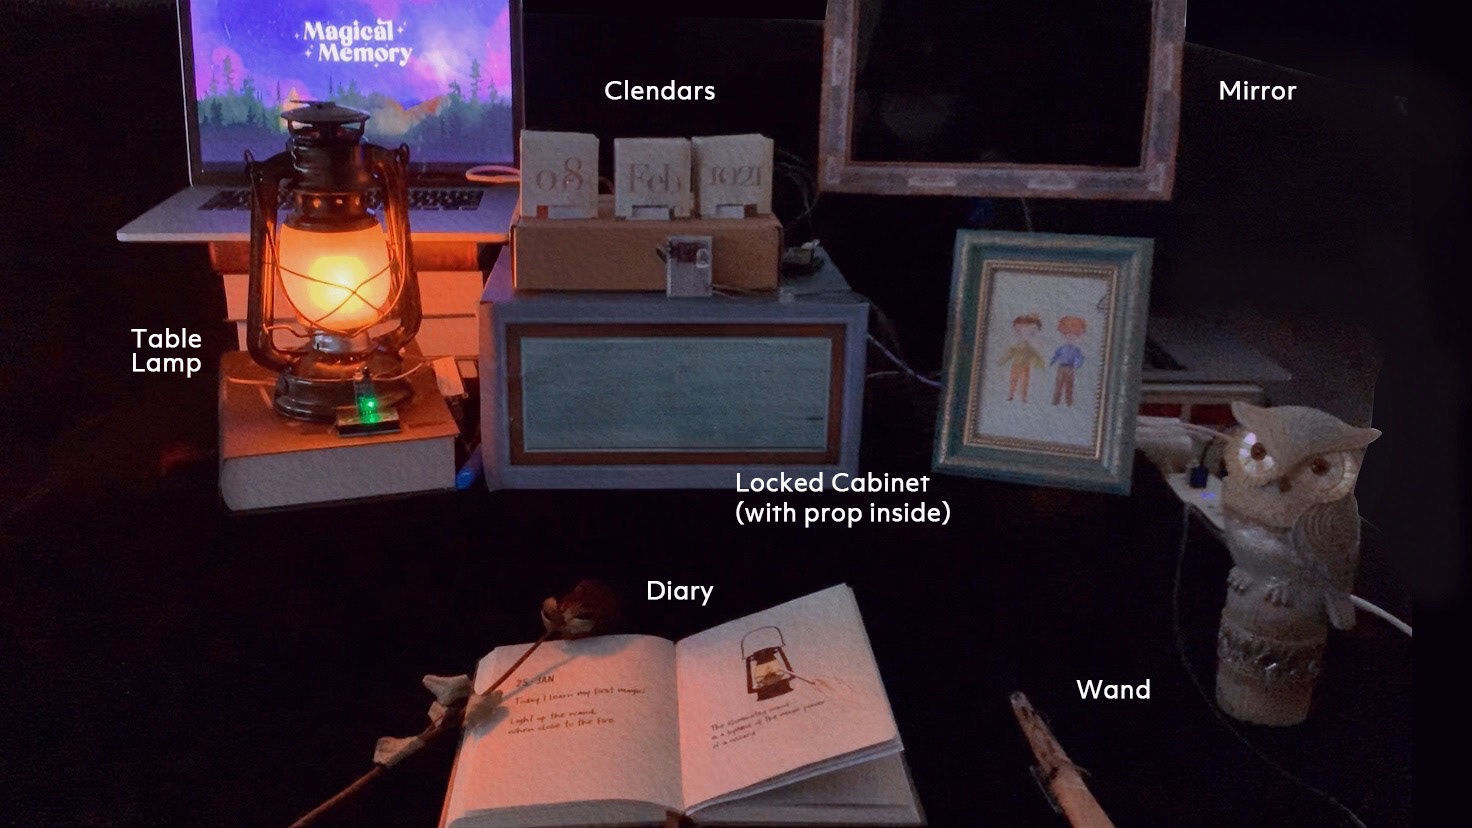
Main Props and Setting
The game mainly includes six props, the magic wand, a table lamp, calendars, a mirror, a locked cabinet, and a small skull inside the cabinet. The user needs to find clues during the experience to know which props need to be found in the next step, what needs to be done, what gestures and spells need to be used.
Main Interactions and Input / Output
Narrative and Key Visuals
The storytelling

Game goal
Game stages

The virtual setting of level 1
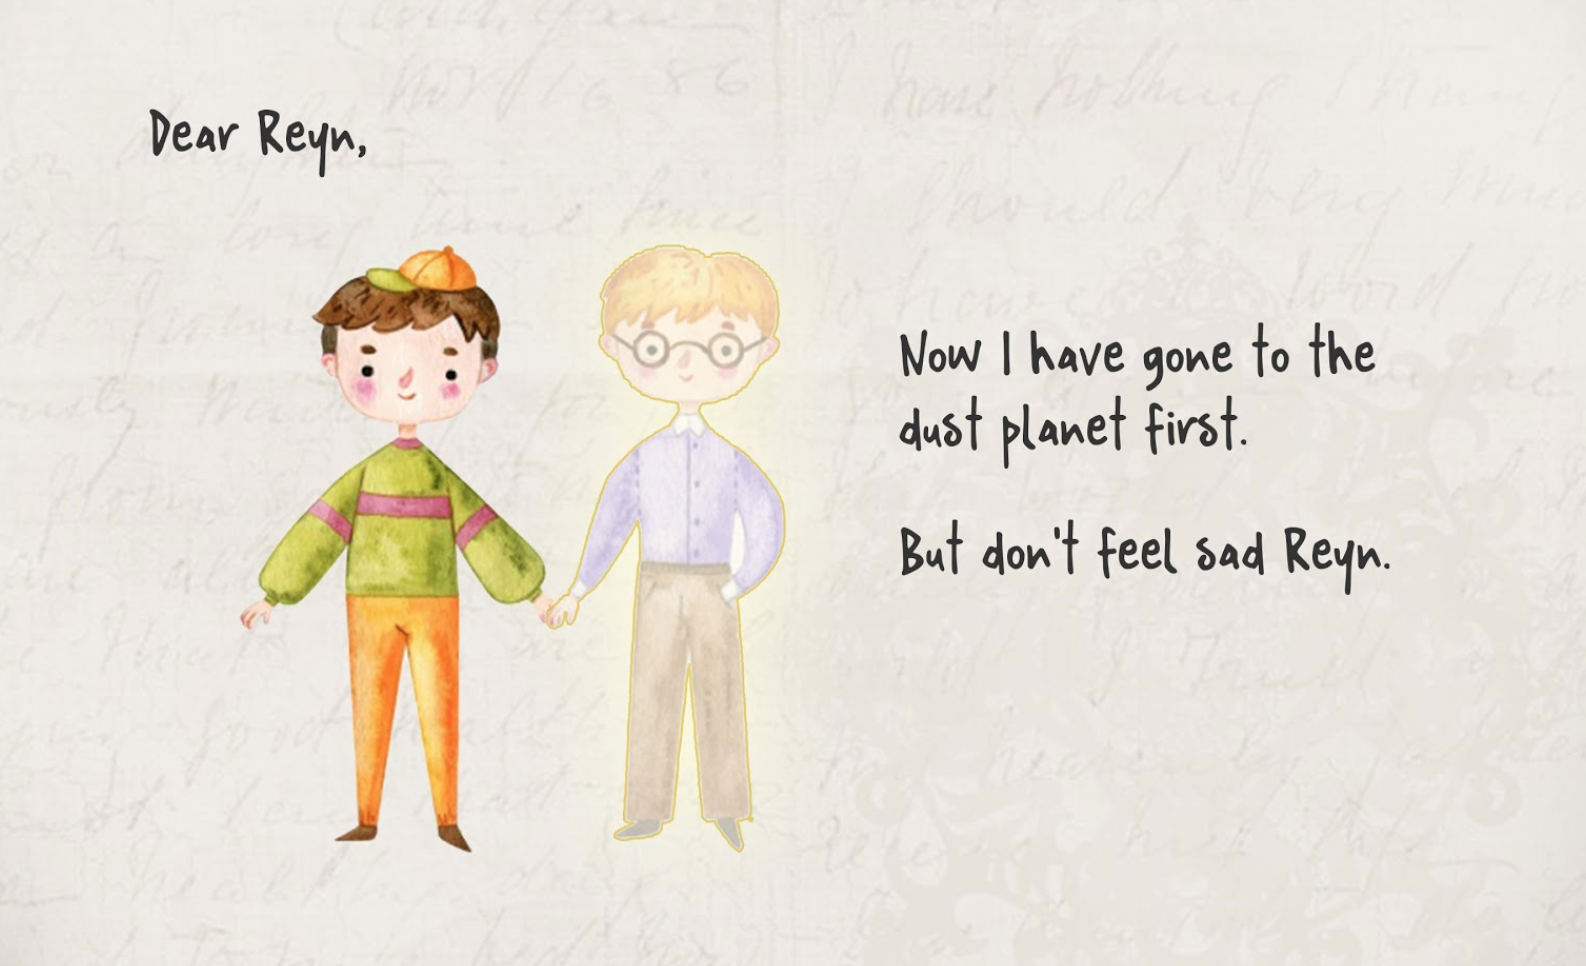
This game has a coherent storyline, which mainly presents a warm and tender friendship in the magic wizard world. There are two main characters, Reyn and Zoe, who have been best friends since they attended the magic school. Unfortunately, Zoe has passed away and Reyn received a letter from Zoe which indicates that Zoe has left a mysterious gift for Reyn. Players, as Reyn, need to uncover the puzzle to find this mysterious gift with magic.
We used a digital screen to present the storytelling video and some game instructions to assist users' tangible experience in the prototype testing.
Instructable Props
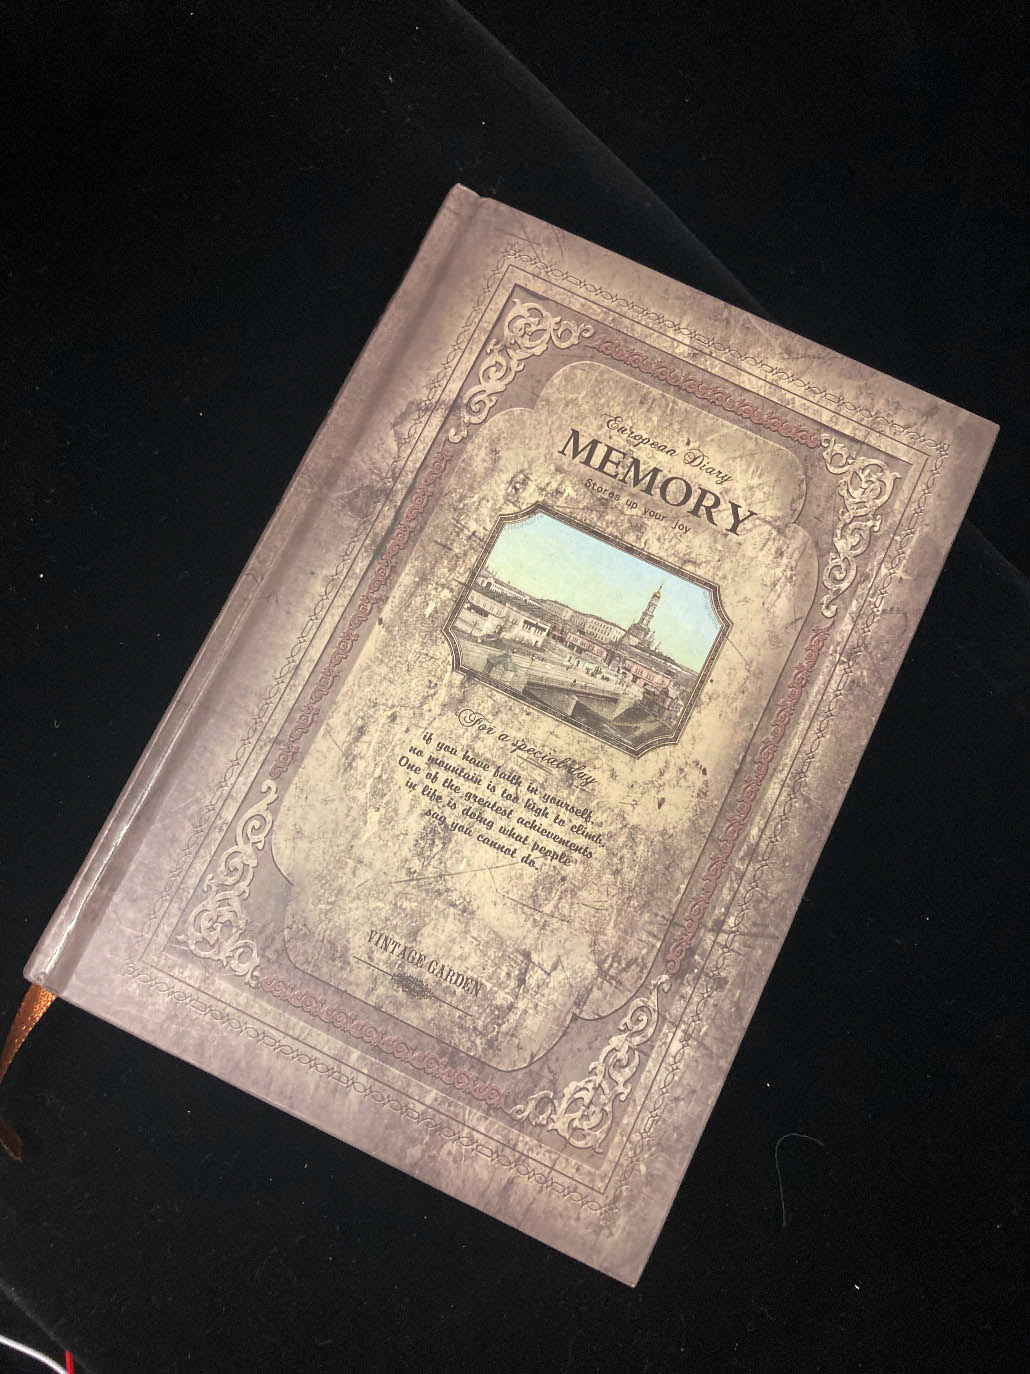

There are two kinds of instructable props in the game setting. One is a diary left by Zoe that provides guidance on magic spells and gestures and clues on puzzle solving. The other one is assistive slides presented on a digital screen in case the user needs help on operations.
Technical Components and Exploration
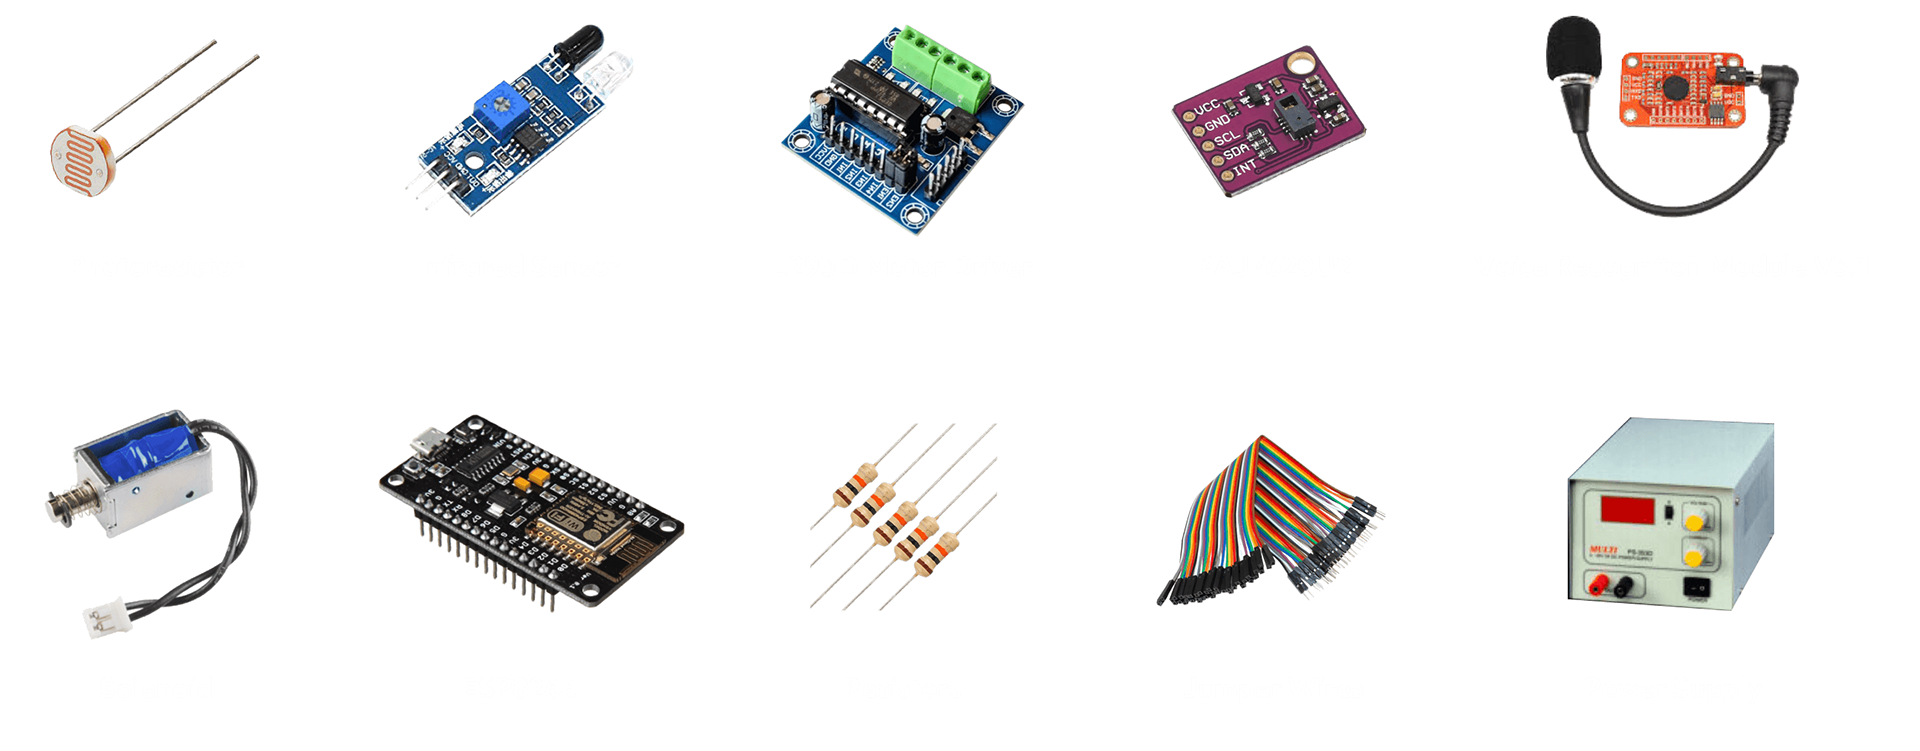
Sensors and Supplies
Communication Protocol
The MQTT protocol is used in this project to communicate messages between devices, hardware, and software. MQTT is for the client to publish data under a specific topic to a broker/server. Other clients which subscribe to that specific topic will receive the published data, so as to use the data to achieve certain purposes like output, control, or monitor.
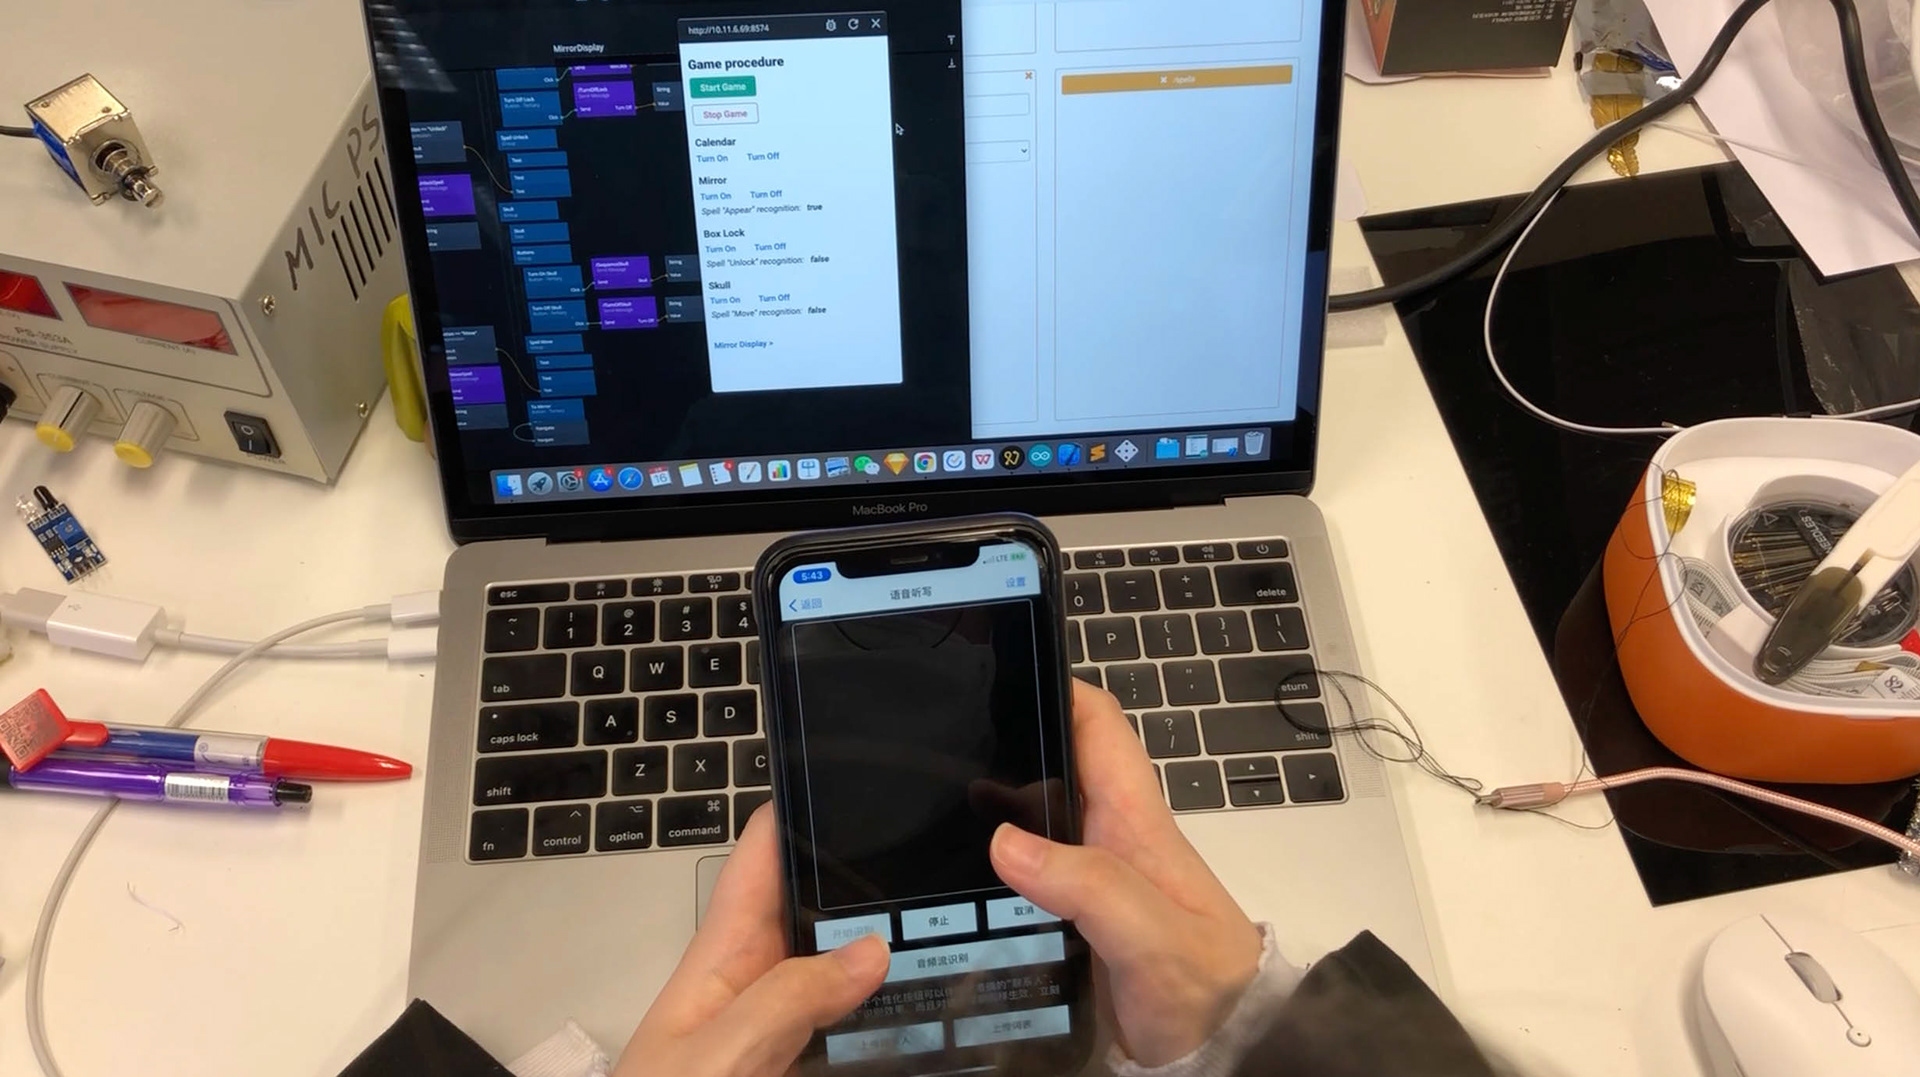
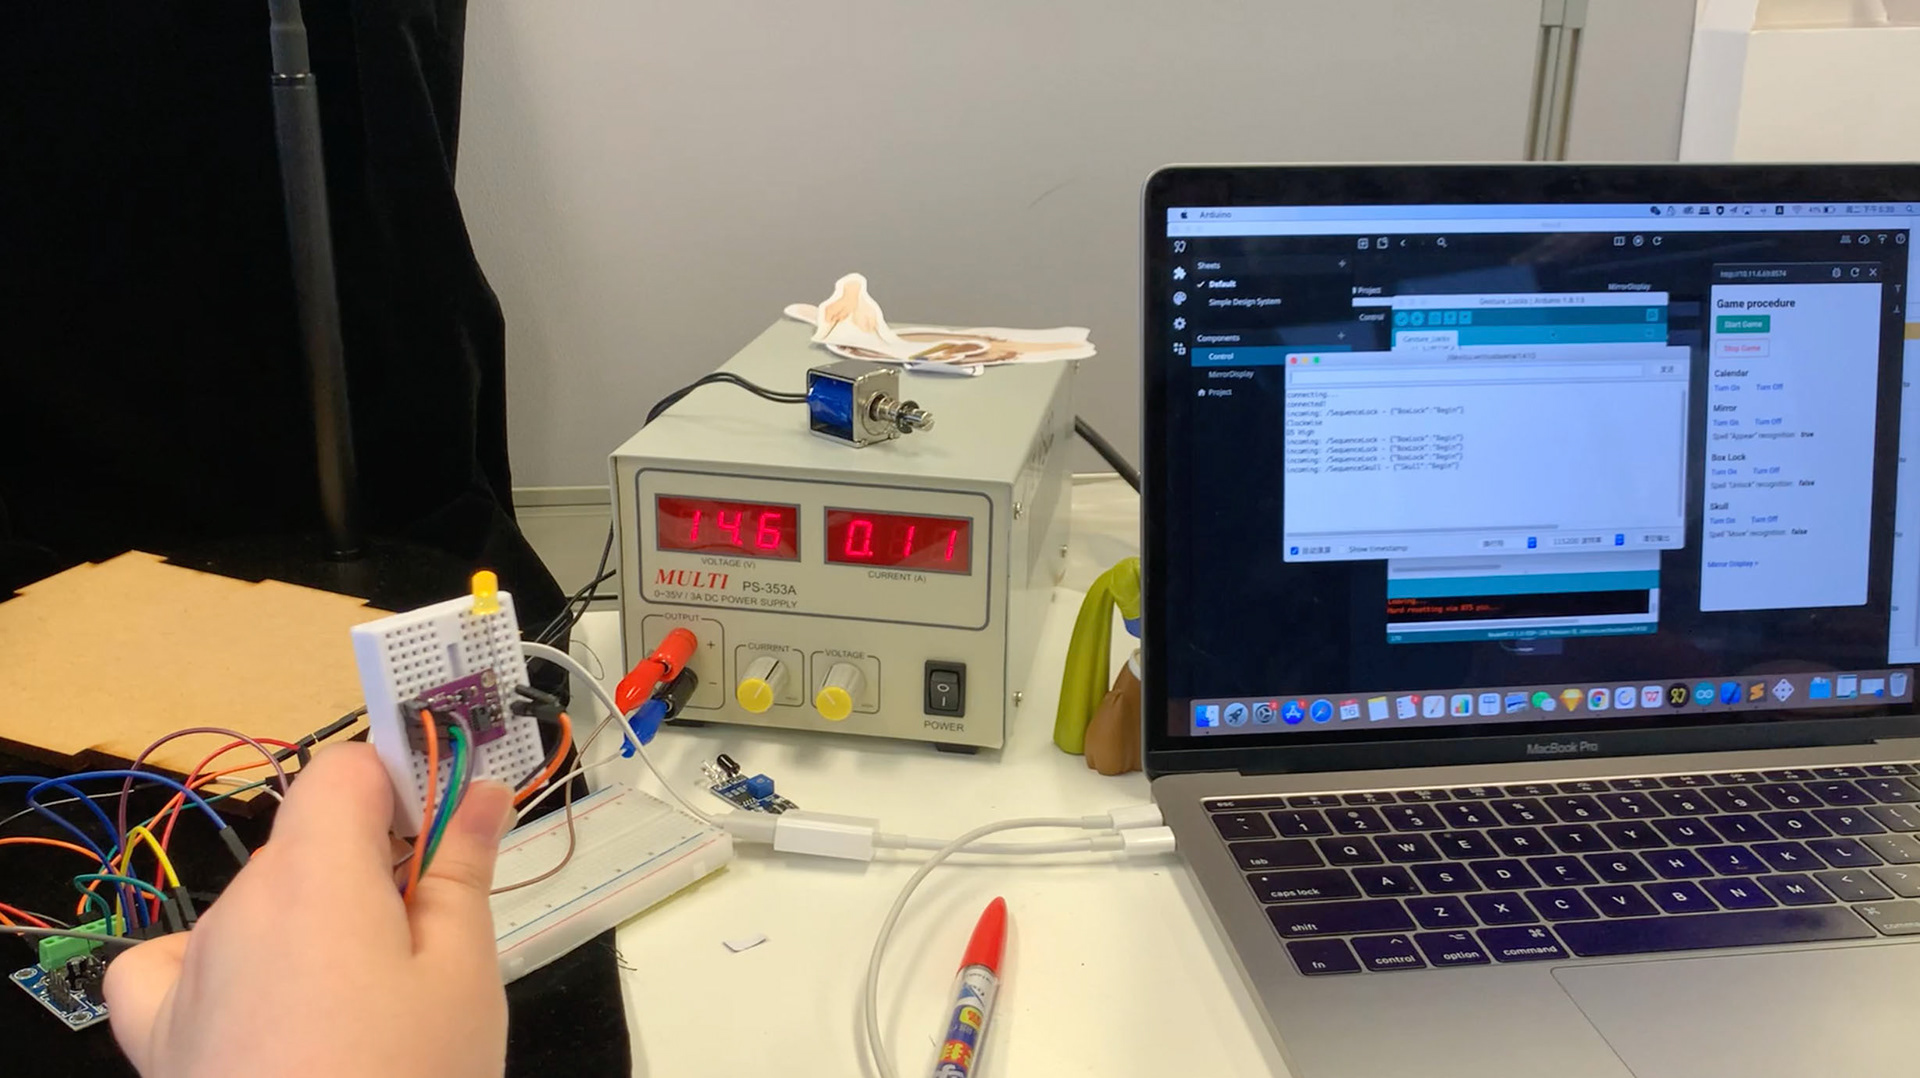
Noodl - Game Controller & Screen Output
I also made the game controller via Noodl, mainly for controlling the overall game sequence, individually starting or stopping each game stage, directly achieving each output without sensor data (in case sensors are unstable, and also for doing self-testing), displaying the voice recognition status, and switching to the mirror output mode.

The Game Controller for Team Members
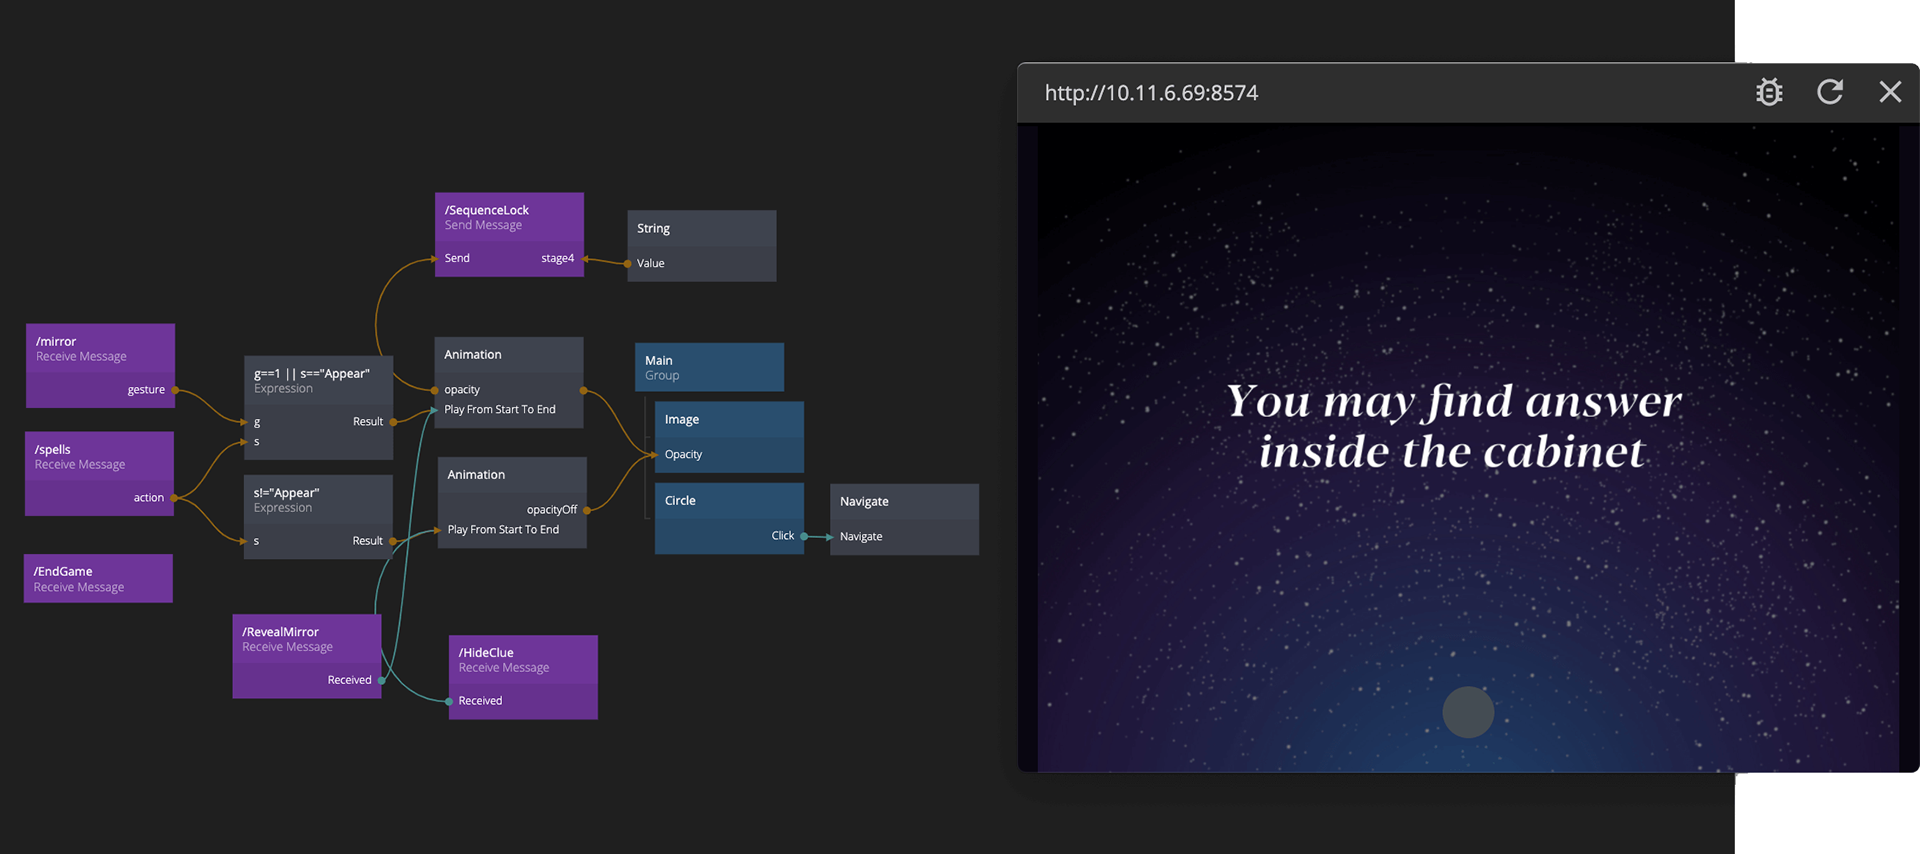
The Screen Output for Game Stage3 (will be introduced in the following section)
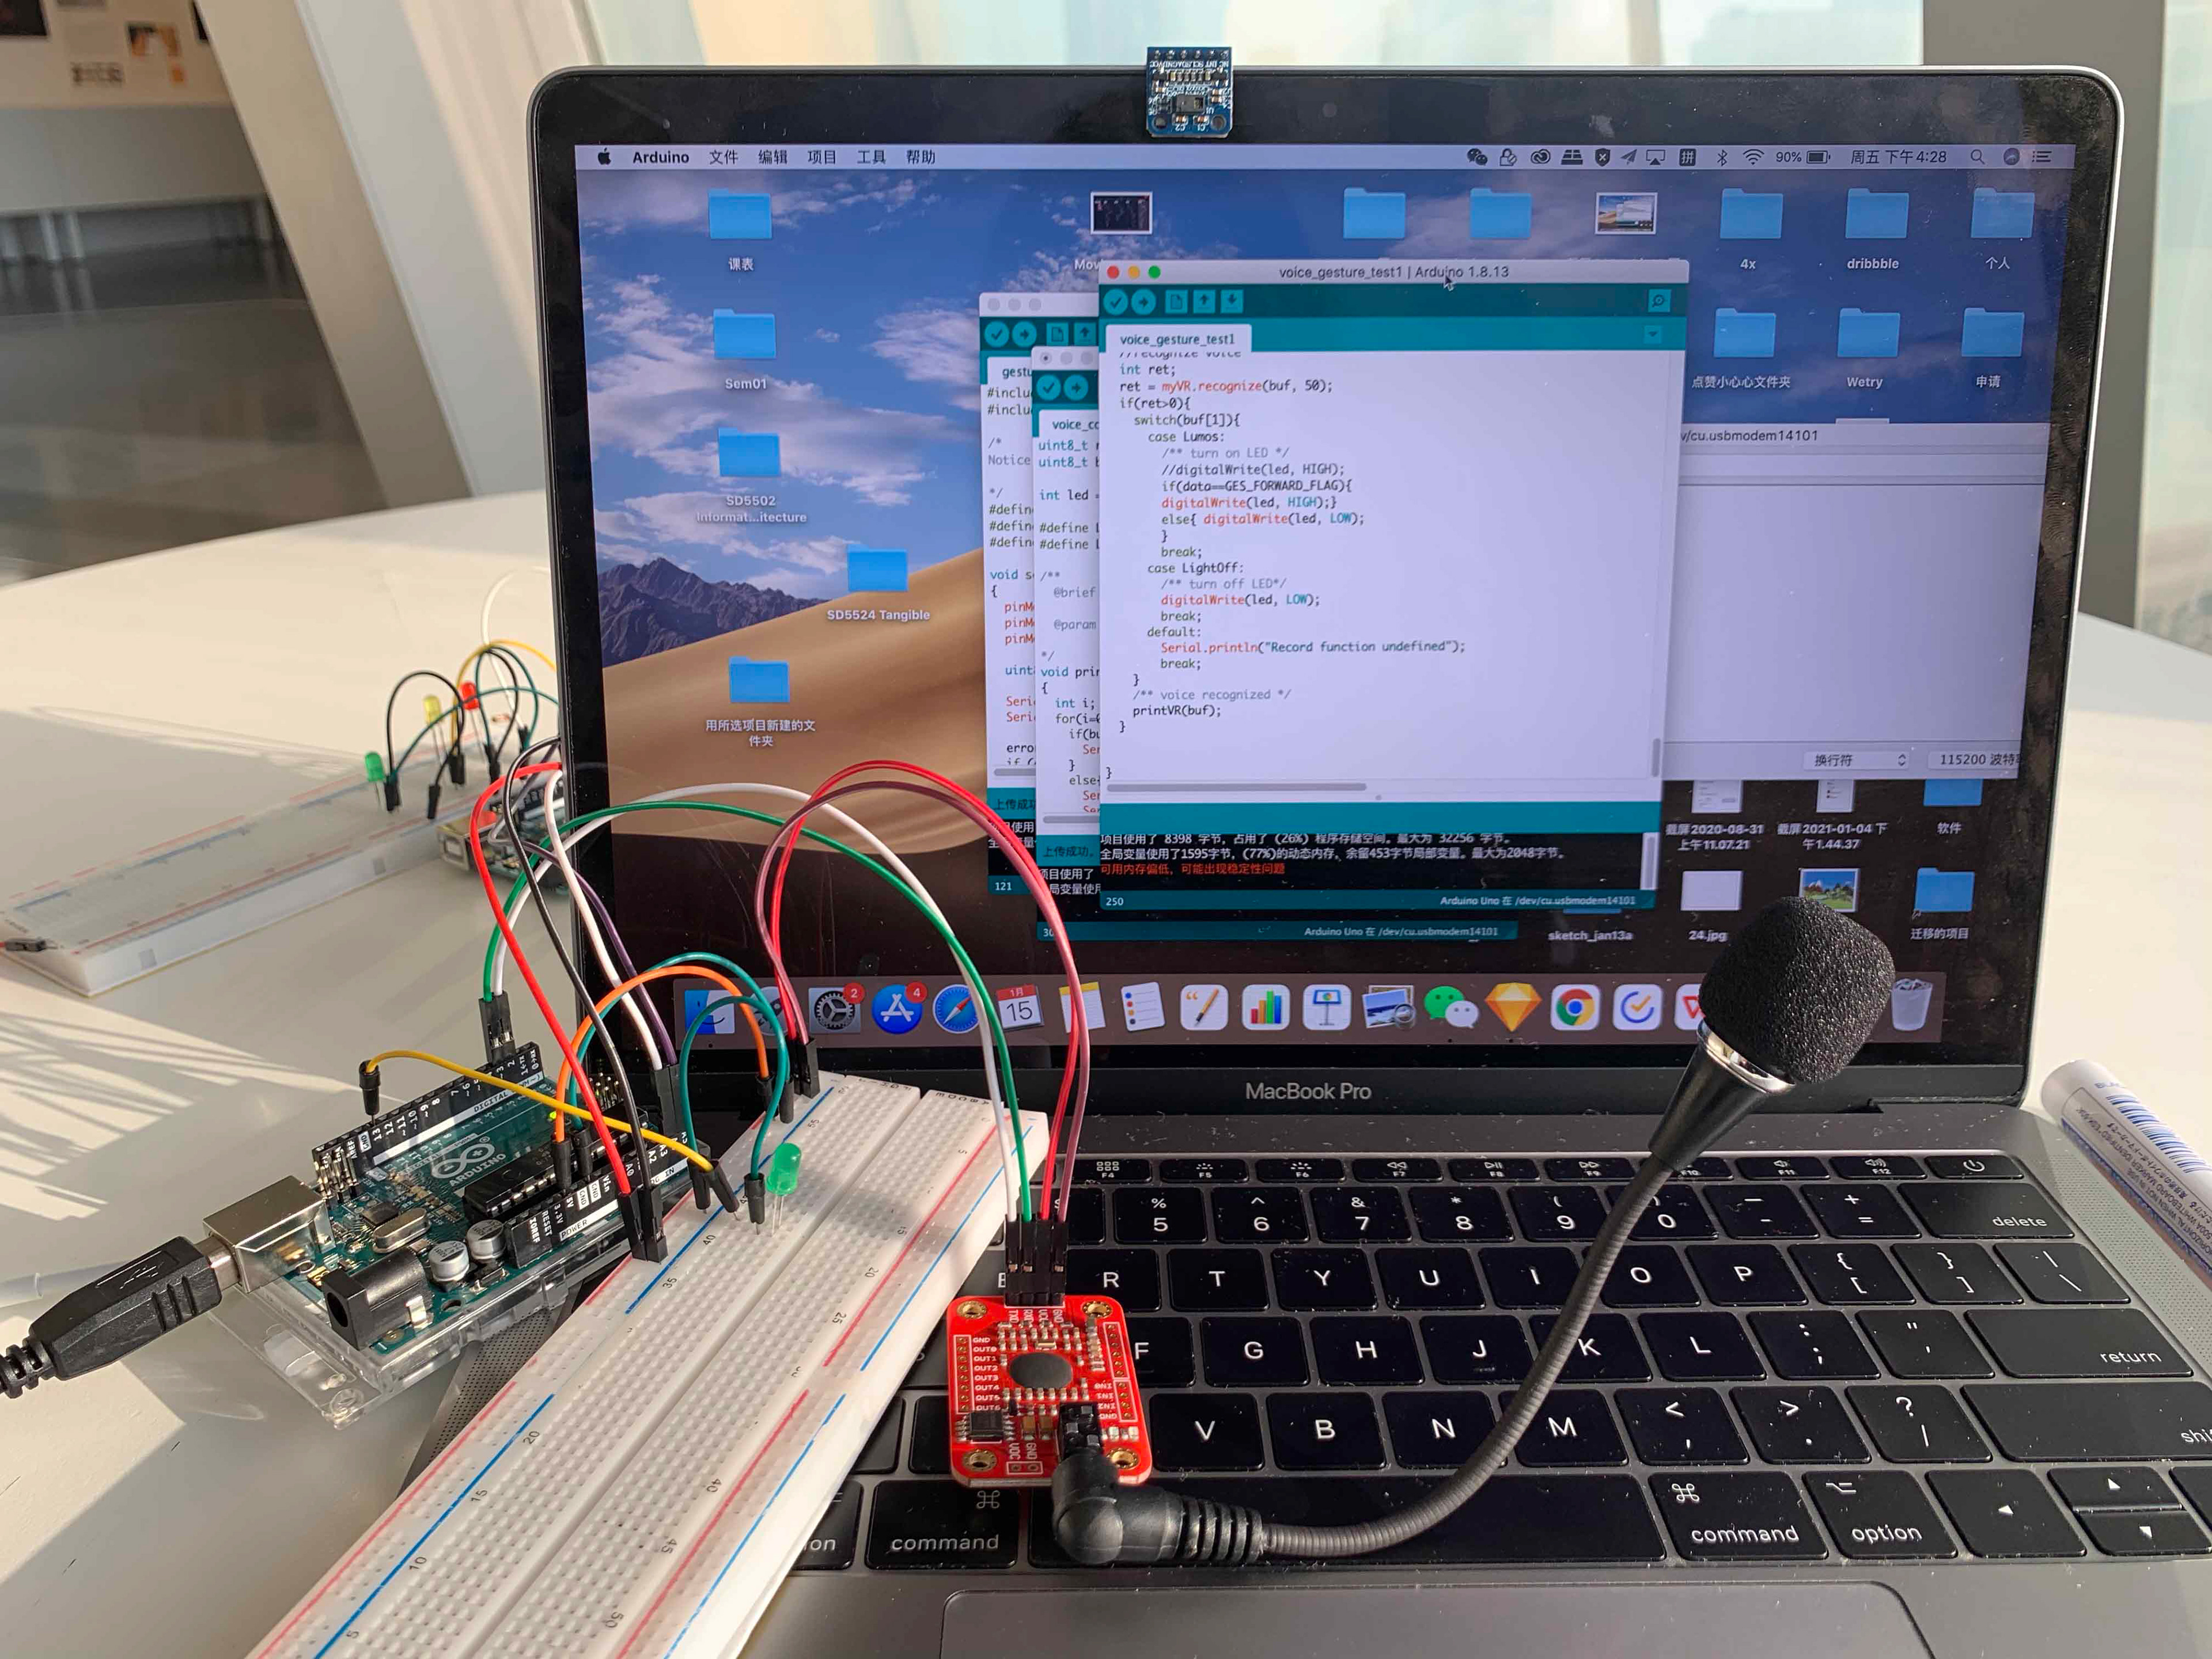
Voice Recognition - Sensor & iFlyTek API
Since spell speaking is input, we first tested the voice recognition module starting from training voice commands. The advantage of this sensor is that it supports customized voice commands which means that we can create interesting spells by ourselves. However, it depends on the quietness of the environment. In the noiseless environments, the accuracy was great; but it always failed to recognize commands in environments with noises.
Considering the influence of the microphone, the 3.5mm lavalier mono microphone was then tested, but the results were unsatisfactory either: the successful recognition rate was very low in the environment with background noises, which made users lose patience quickly.
The Voice Recognition Module V3.1
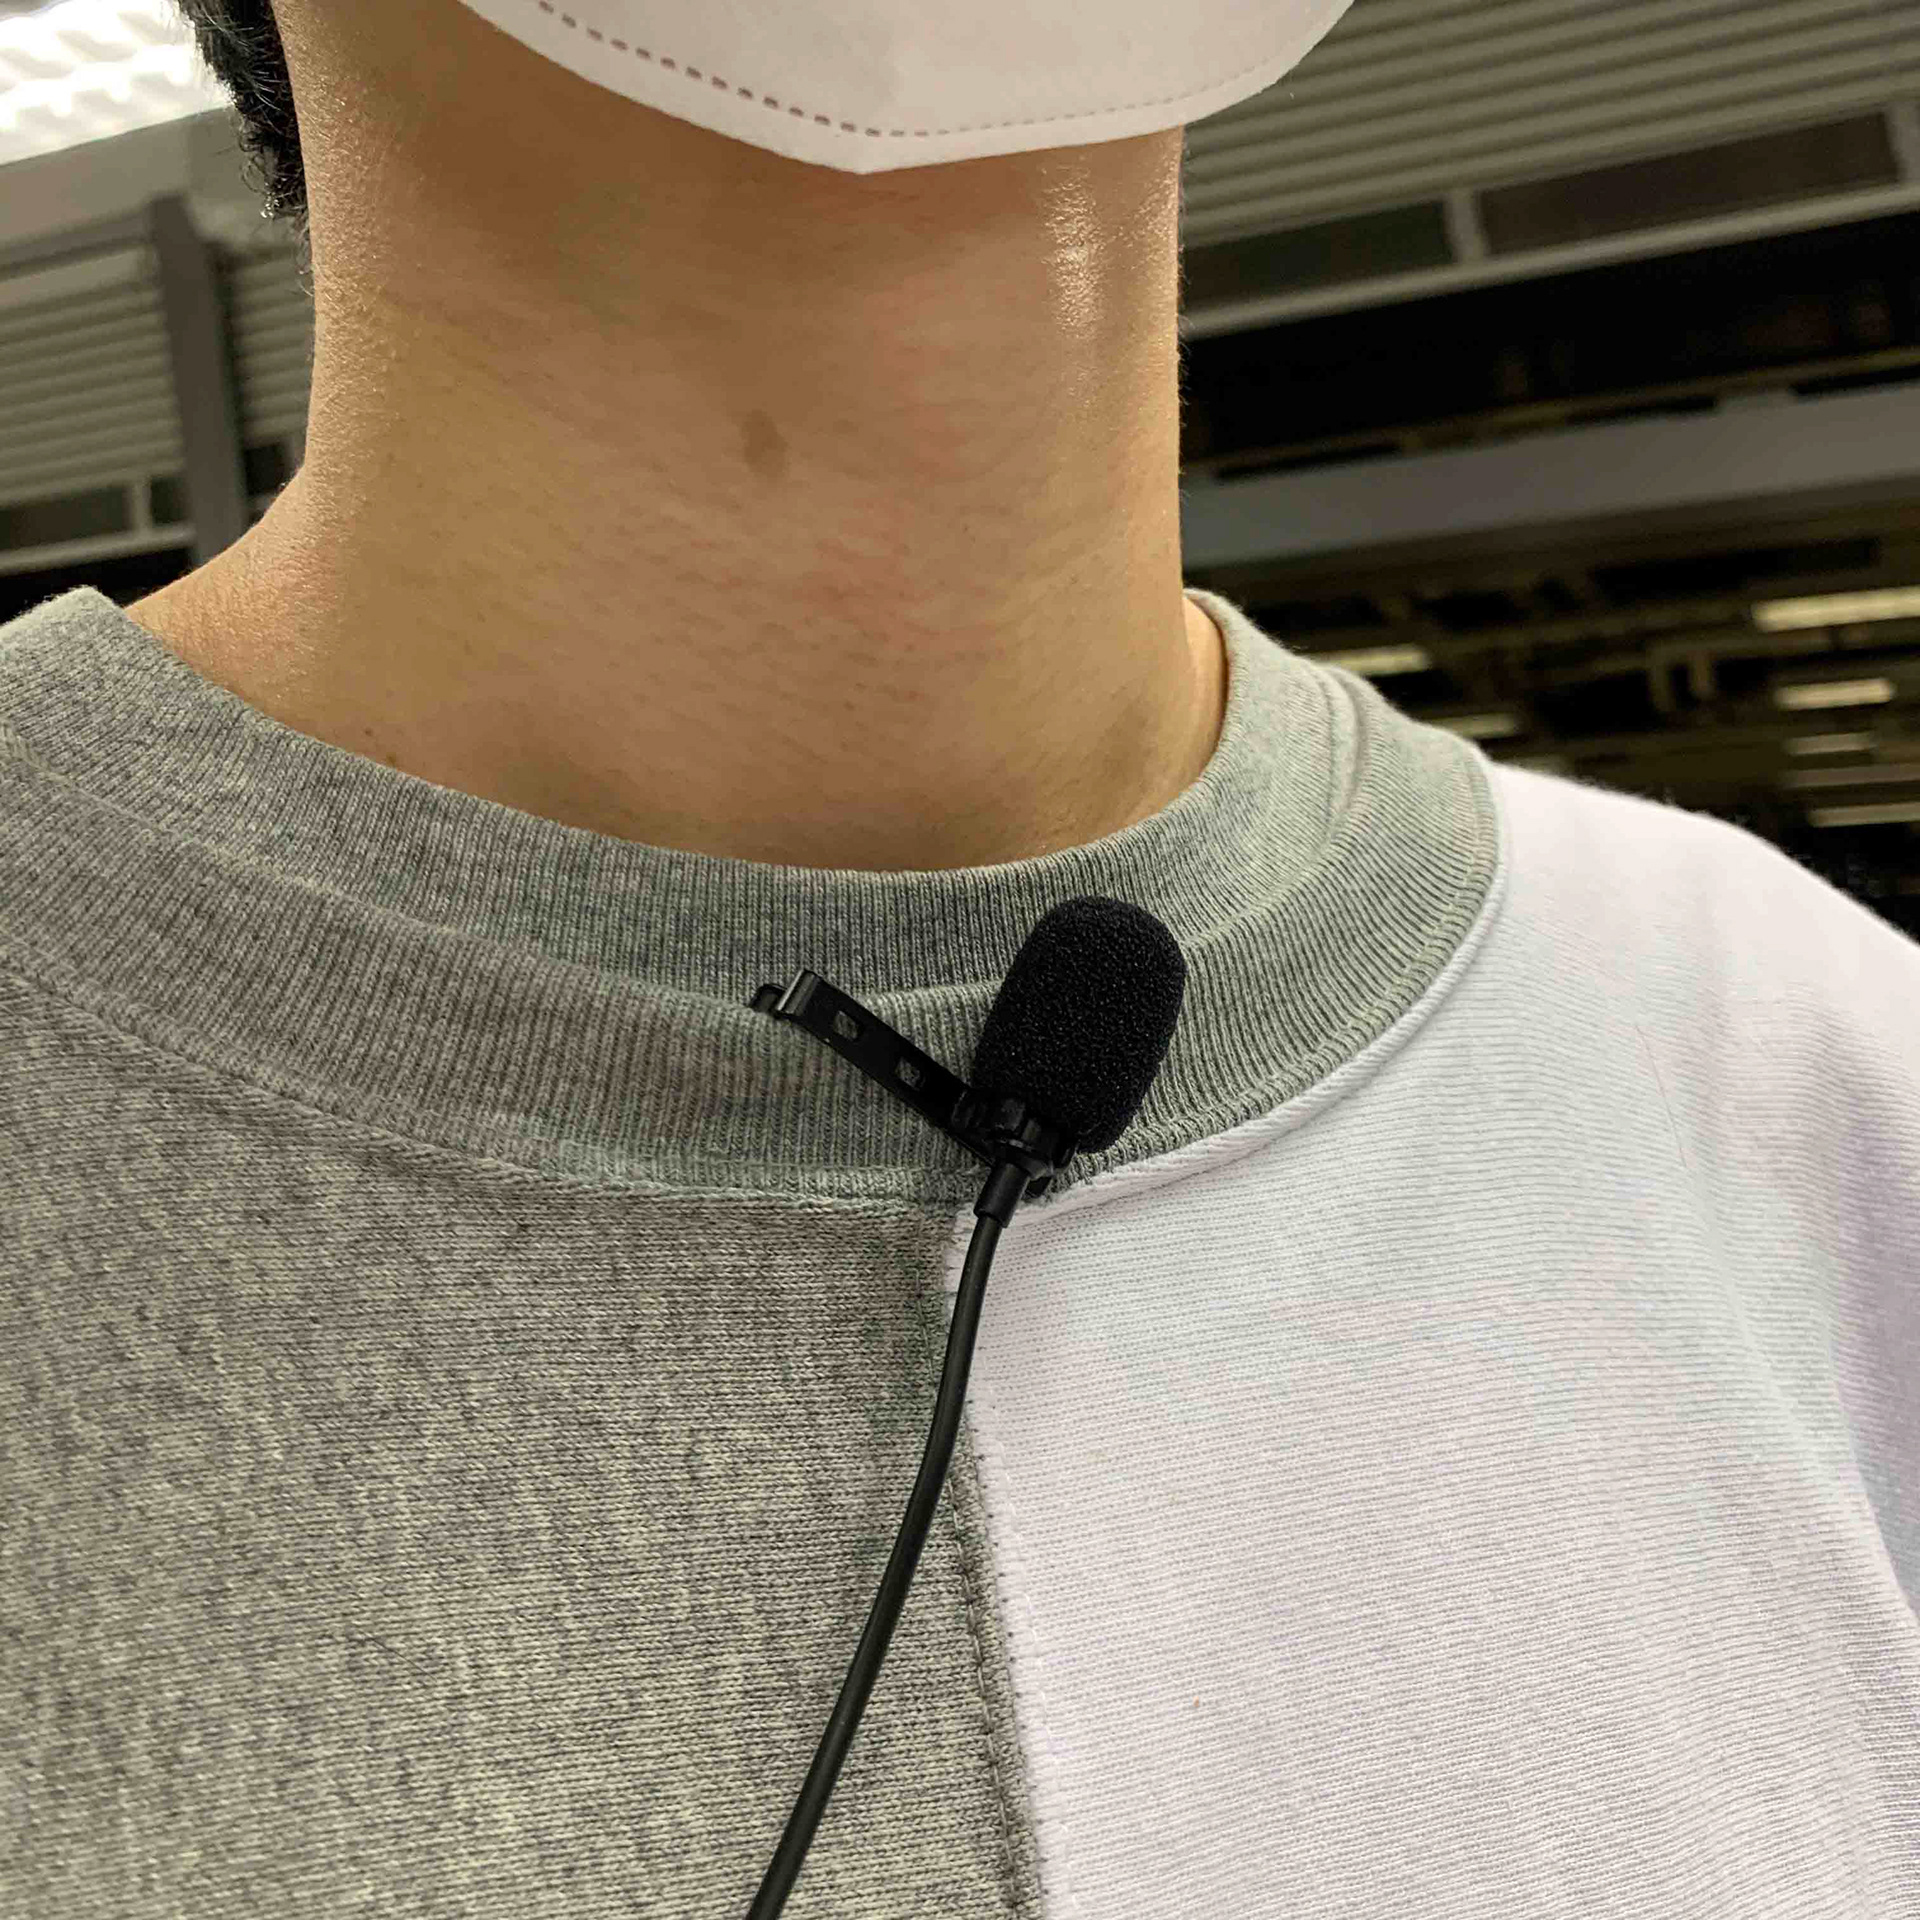
Lavalier mono microphone
Therefore, I chose to test the open-source cloud speech recognition iFlyTek API. It has several key features that meet our needs: 1) The demo App provides the default user interfaces with basic function demonstration; 2) It supports recognizing 500 times for free every day; 3) It supports microphone voice input or audio upload for speech recognition.

Connect iFlyTek iOS App to MQTT
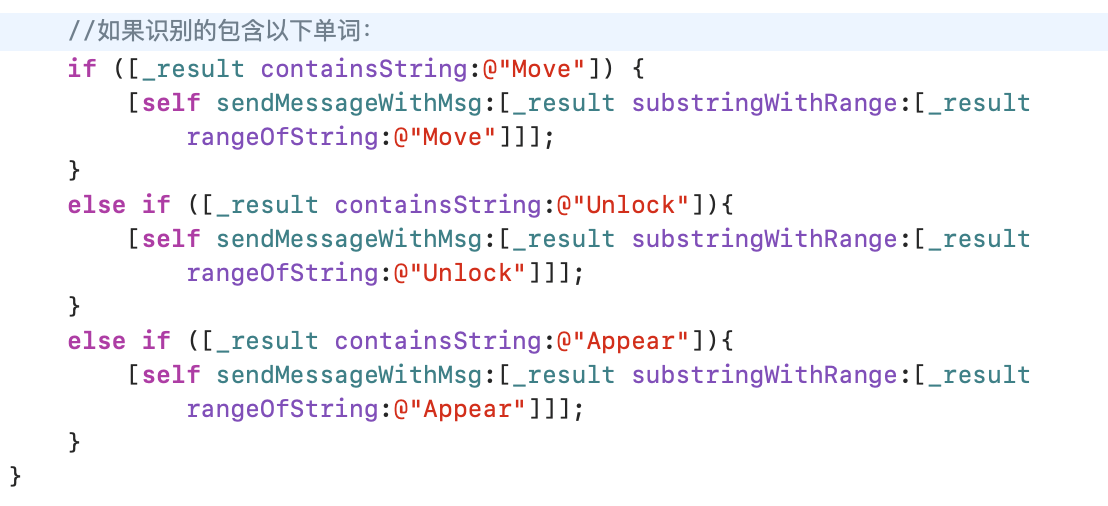
Define key words
We finally decided to adopt the API (iOS demo App) instead of the voice recognition sensor for it worked relatively accurately in even a non-quiet environment. However, it cannot recognize self-made voice commands so we eventually only used existing words as the 'spells'. MQTT was also used to receive the recognition results thus triggering outputs on the device and board.
The demo App testing
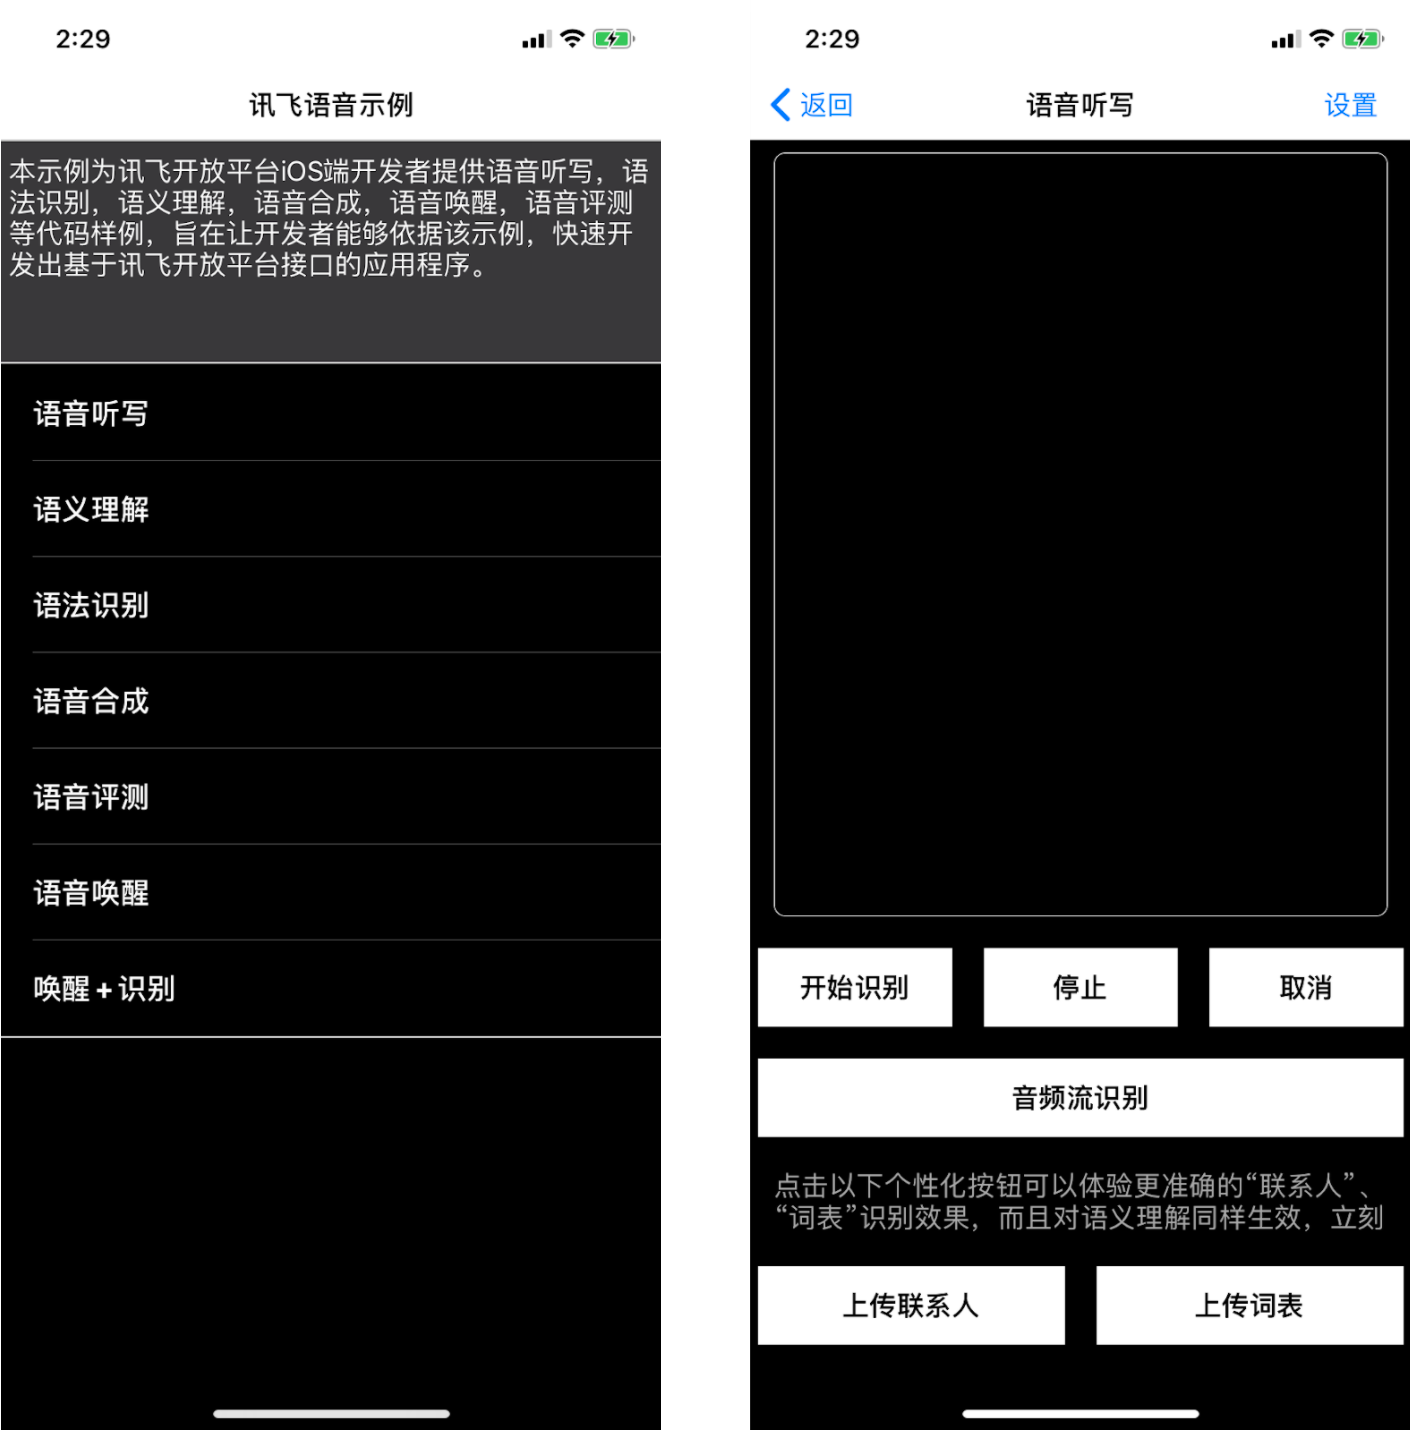
App interface
Gesture Recognition, Motor Drive, Solenoids
The gesture of waving wand is also an input, so I tested the gesture recognition sensor PAJ7620U2. The result was successful, it can detect 9 gestures, among which we eventually chose clockwise, forward, wave as the gesture input to trigger the output. However, it has a distance limitation of detection which is about 15cm.
Since unlocking the cabinet and knocking down the prop inside the cabinet require solenoids (electromagnetic locks) movements, which need 12 volts of power, so the motor drive was used for voltage conversion. We integrated the gesture recognition module with the L293D motor drive, 2 solenoids, and the power supply.
PAJ7620U2 testing
Testing of triggering solenoids' movements
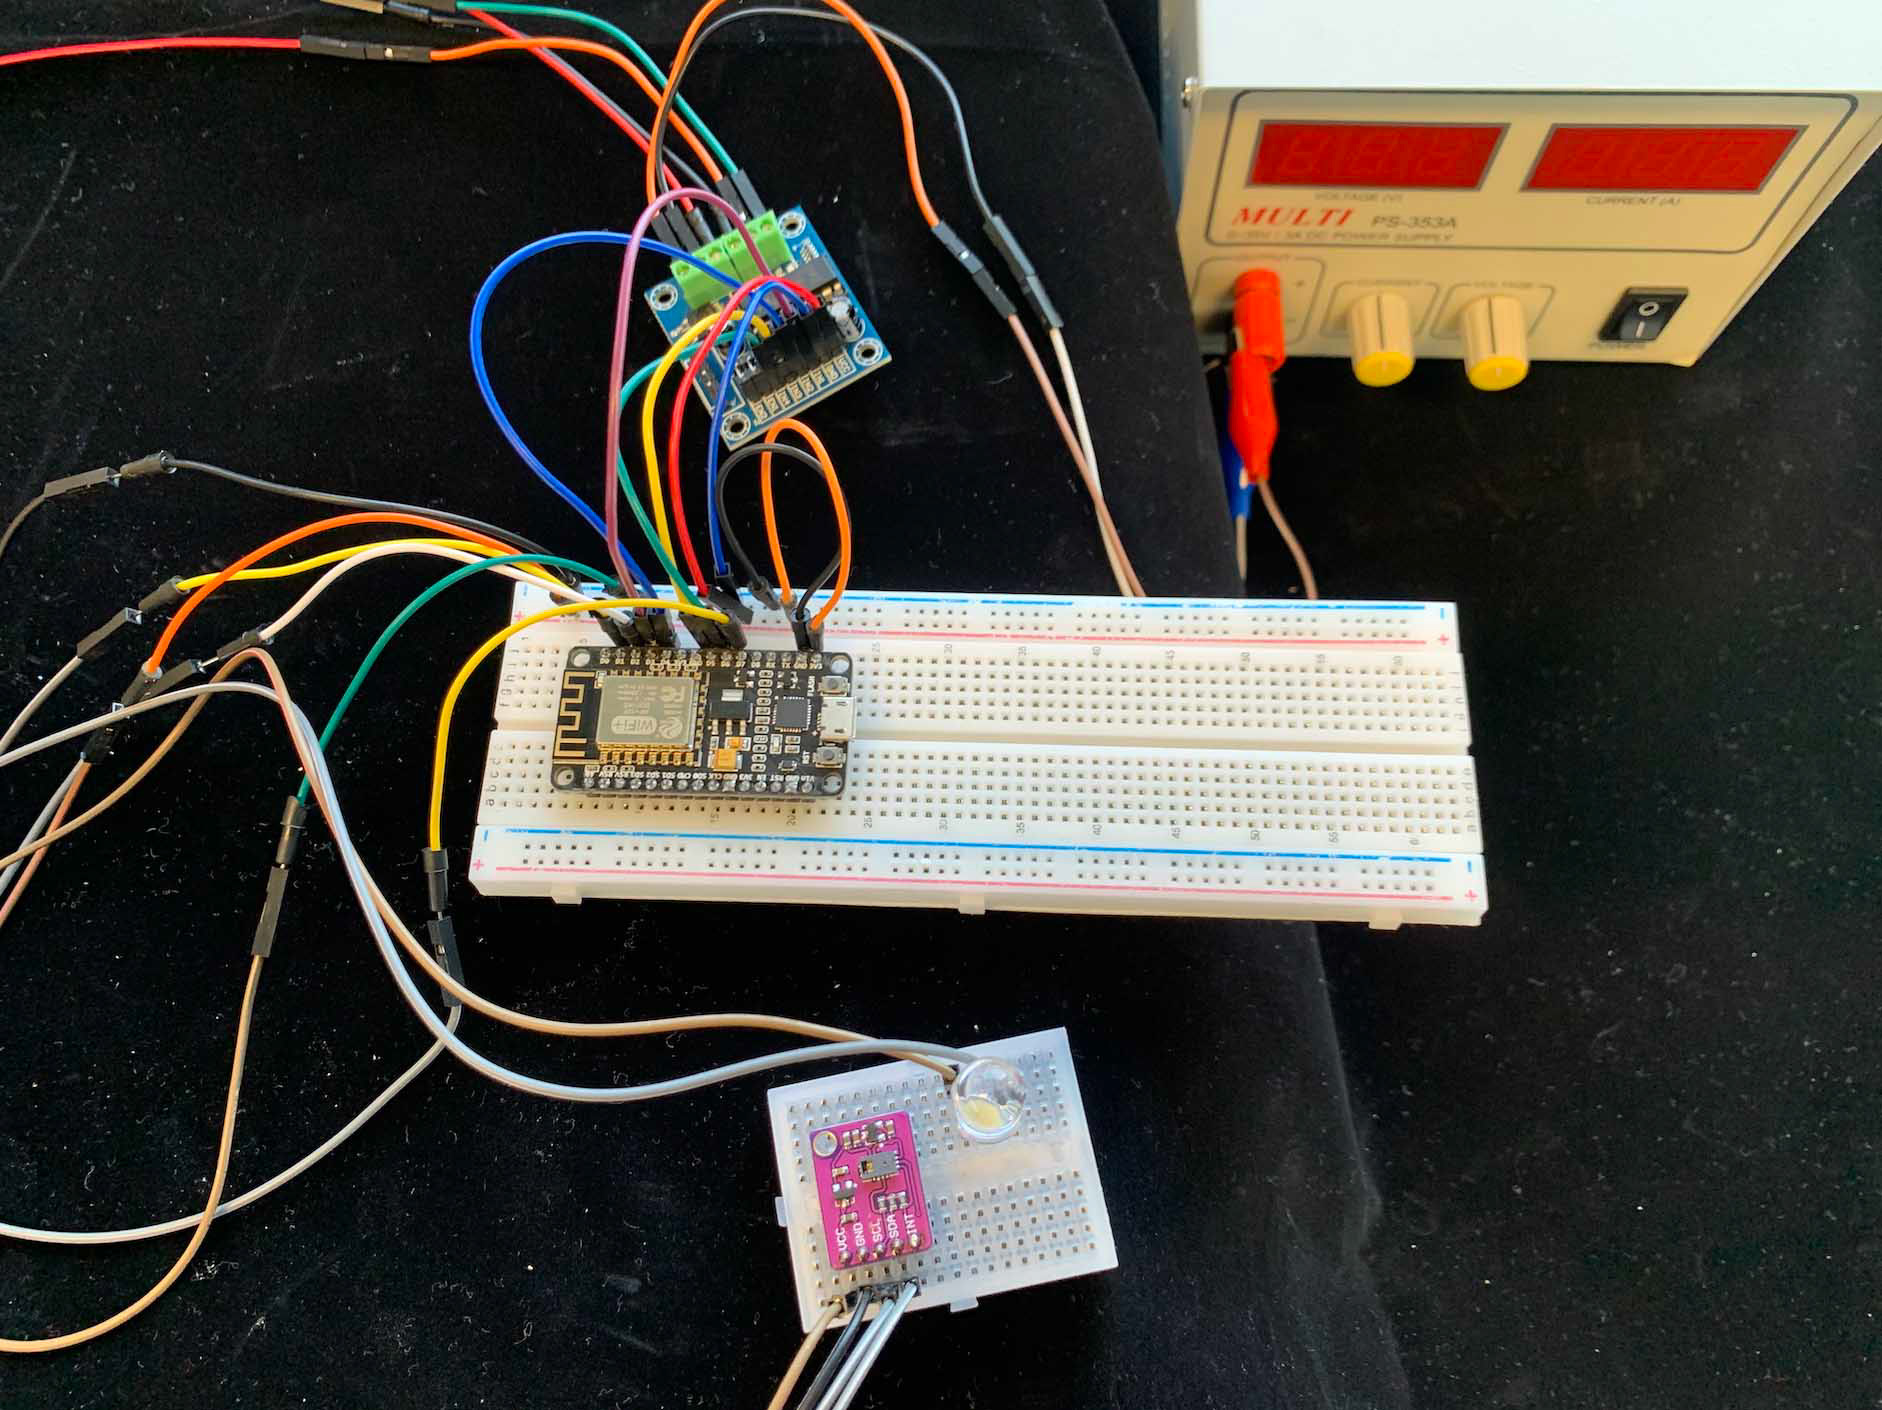
Circuit
Solenoids
Testing
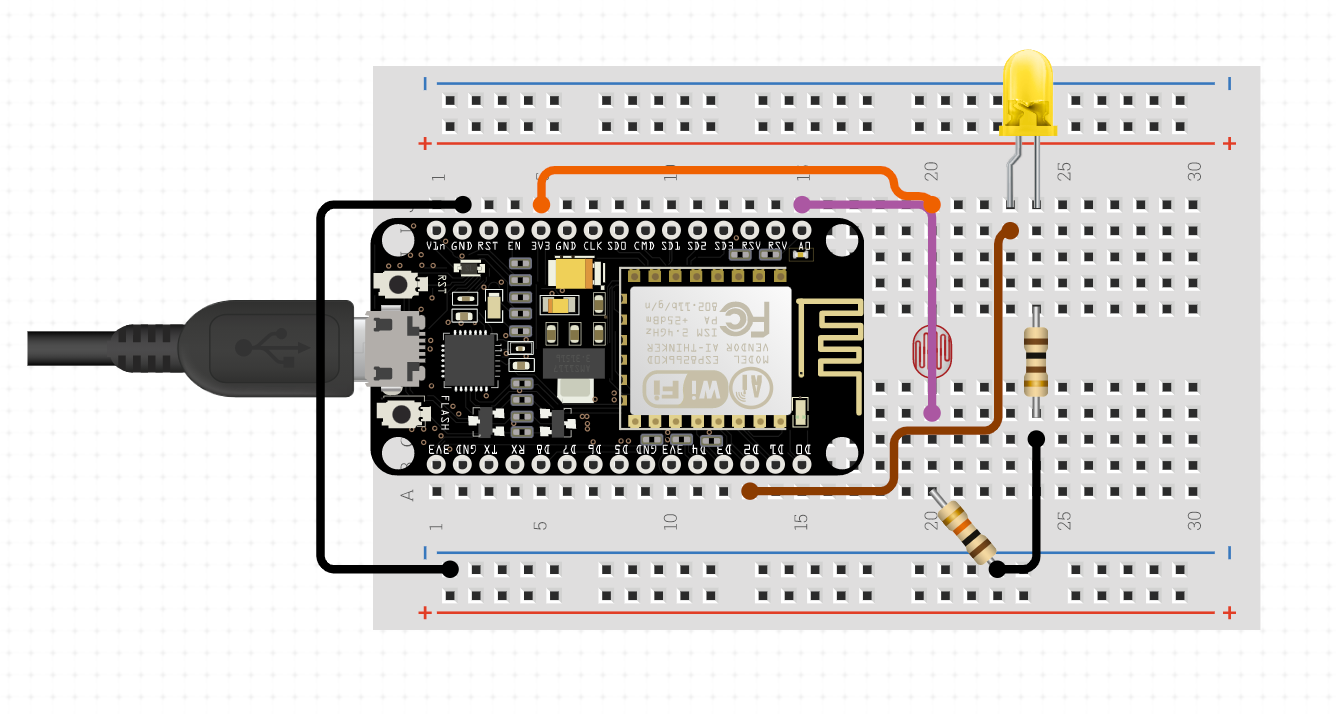
Infrared Sensor & Photoresistor
Originally, I use infrared sensors and proximity as the trigger mechanism for the first two steps: 1) When the wand is close to the first infrared sensor, the LED at the tip of the wand will light up; 2) When the wand is close to the infrared sensor behind, the LED in the calendar will be lit.
Then we iterated the stage of lighting up the calendars. If we use the IR sensor, everything close to it will trigger the output, but we want to build a tighter mapping between the wand light and other objects, so we decided to use the light value as the input and we tested the photo-resistors. And this forms a decryption sequence-only when the magic wand is lighted can the clues on the calendar box be unlocked.
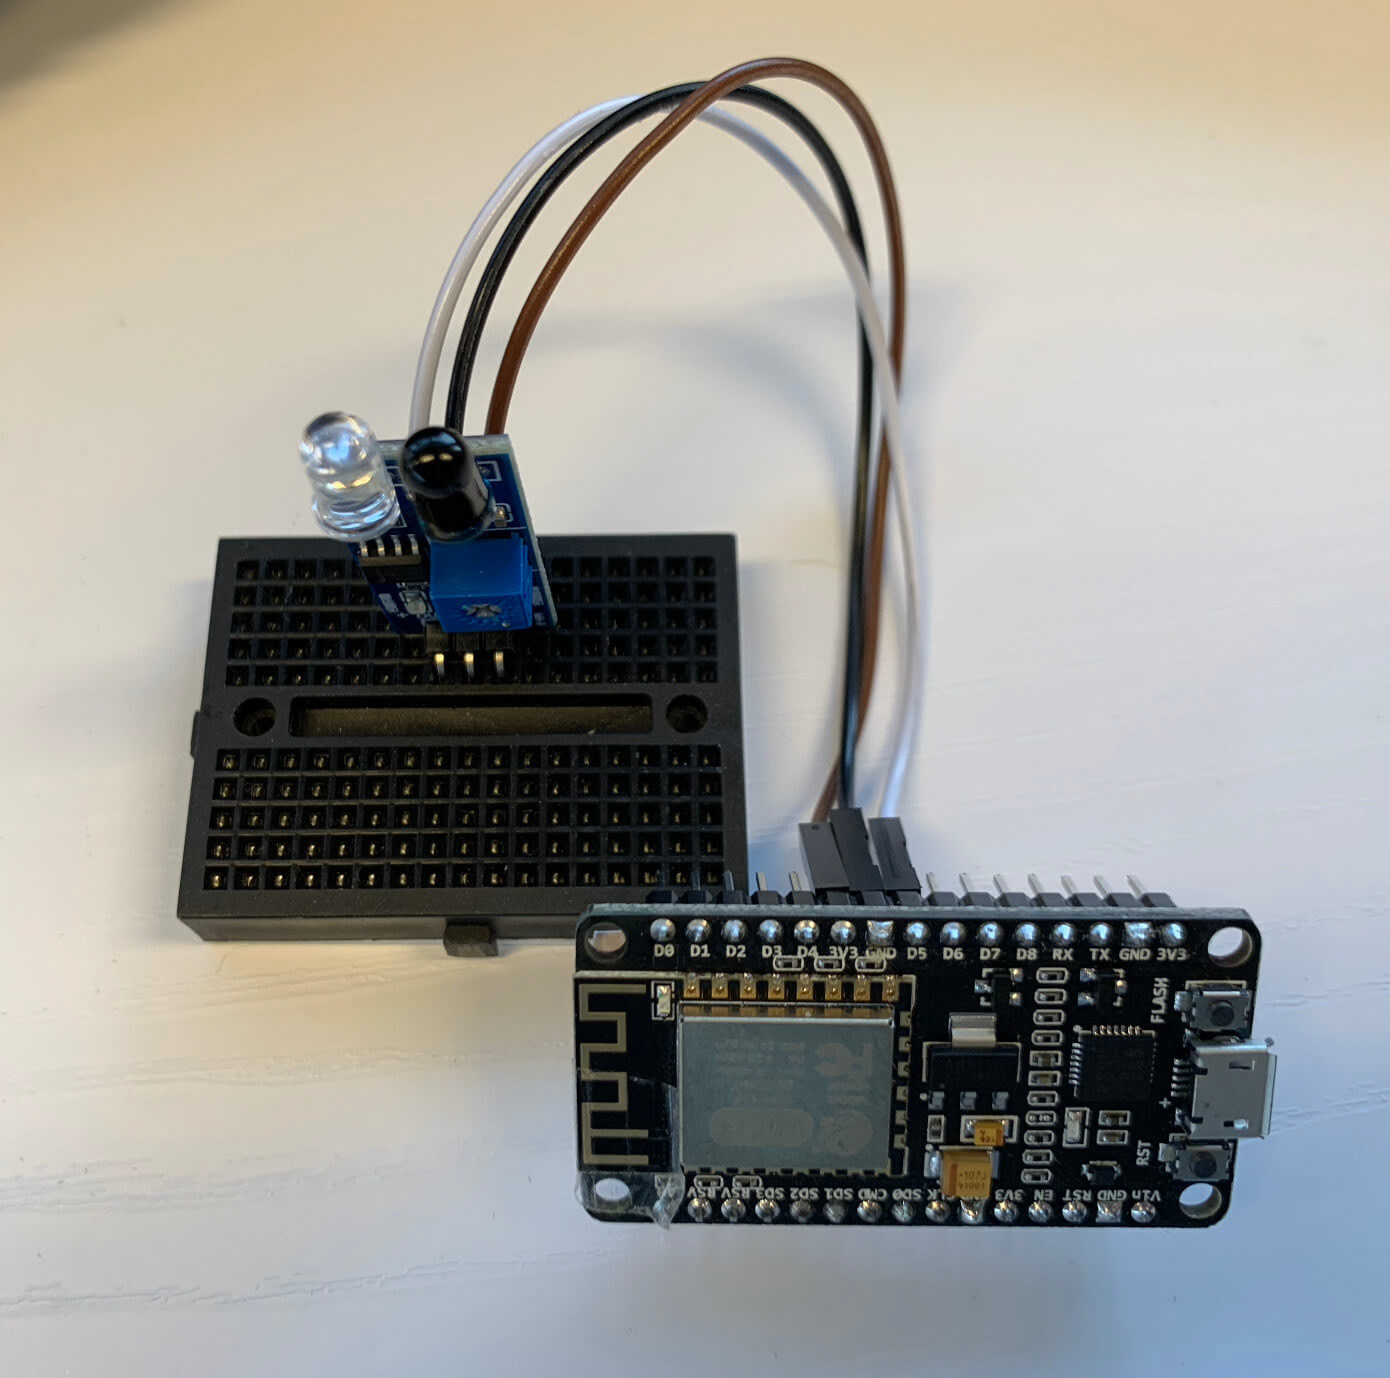
IR Sensor
Photoresistors with LEDs
Testing
Prototyping and Technical Details
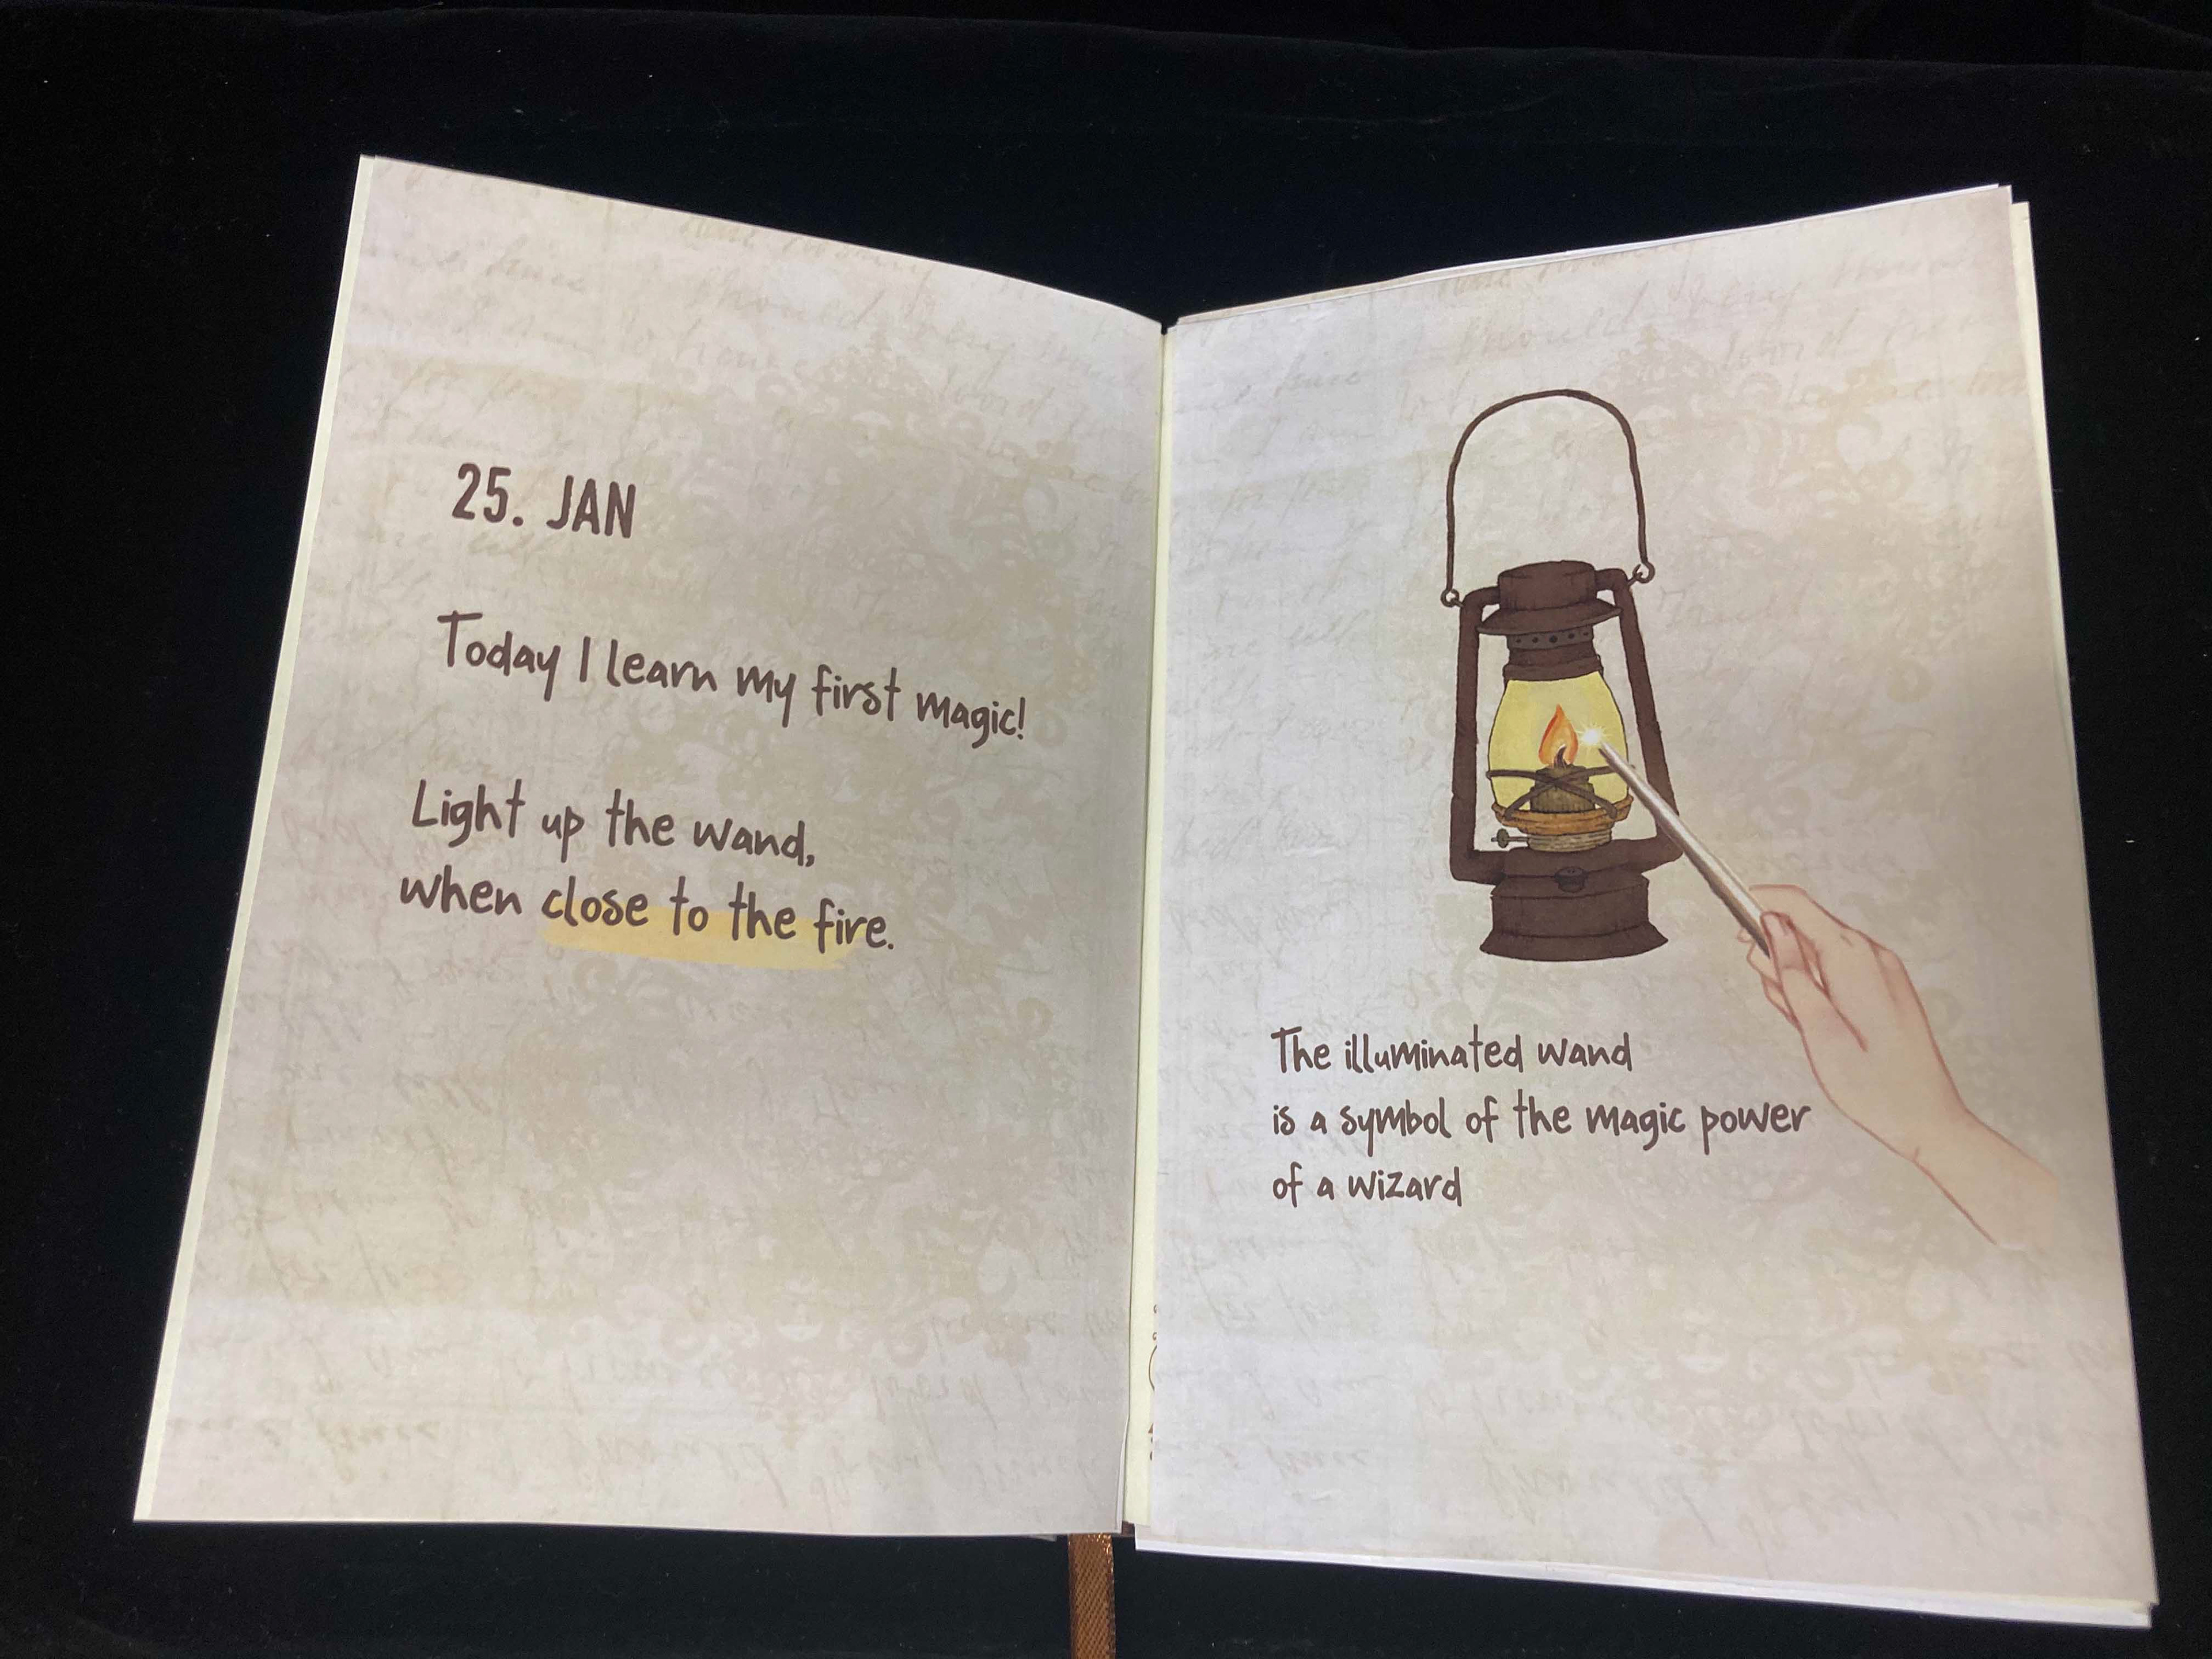
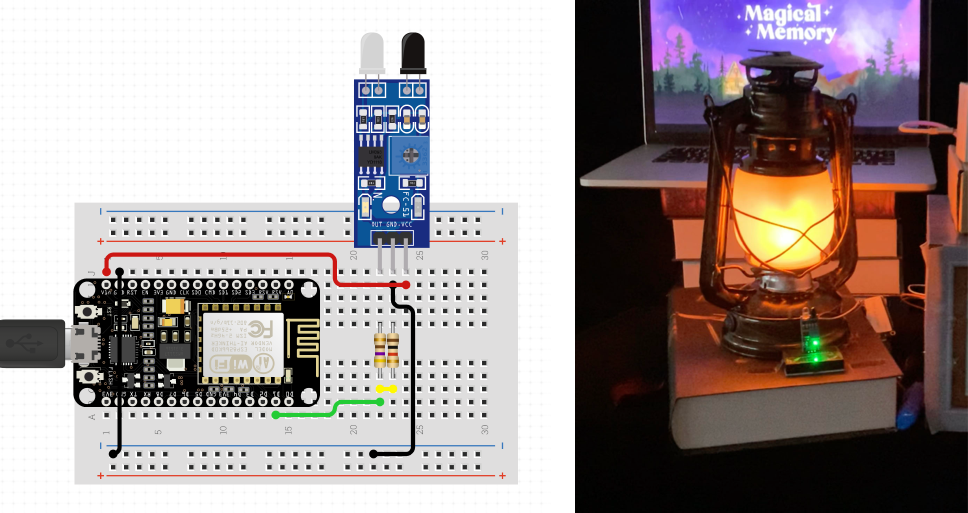
Game Stage1 - Illuminate Wand and Awaken Magic
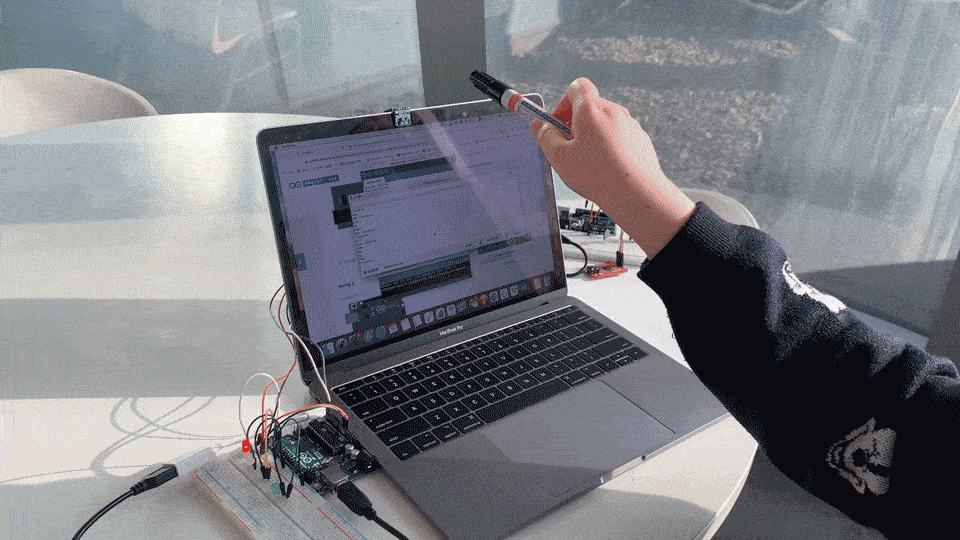
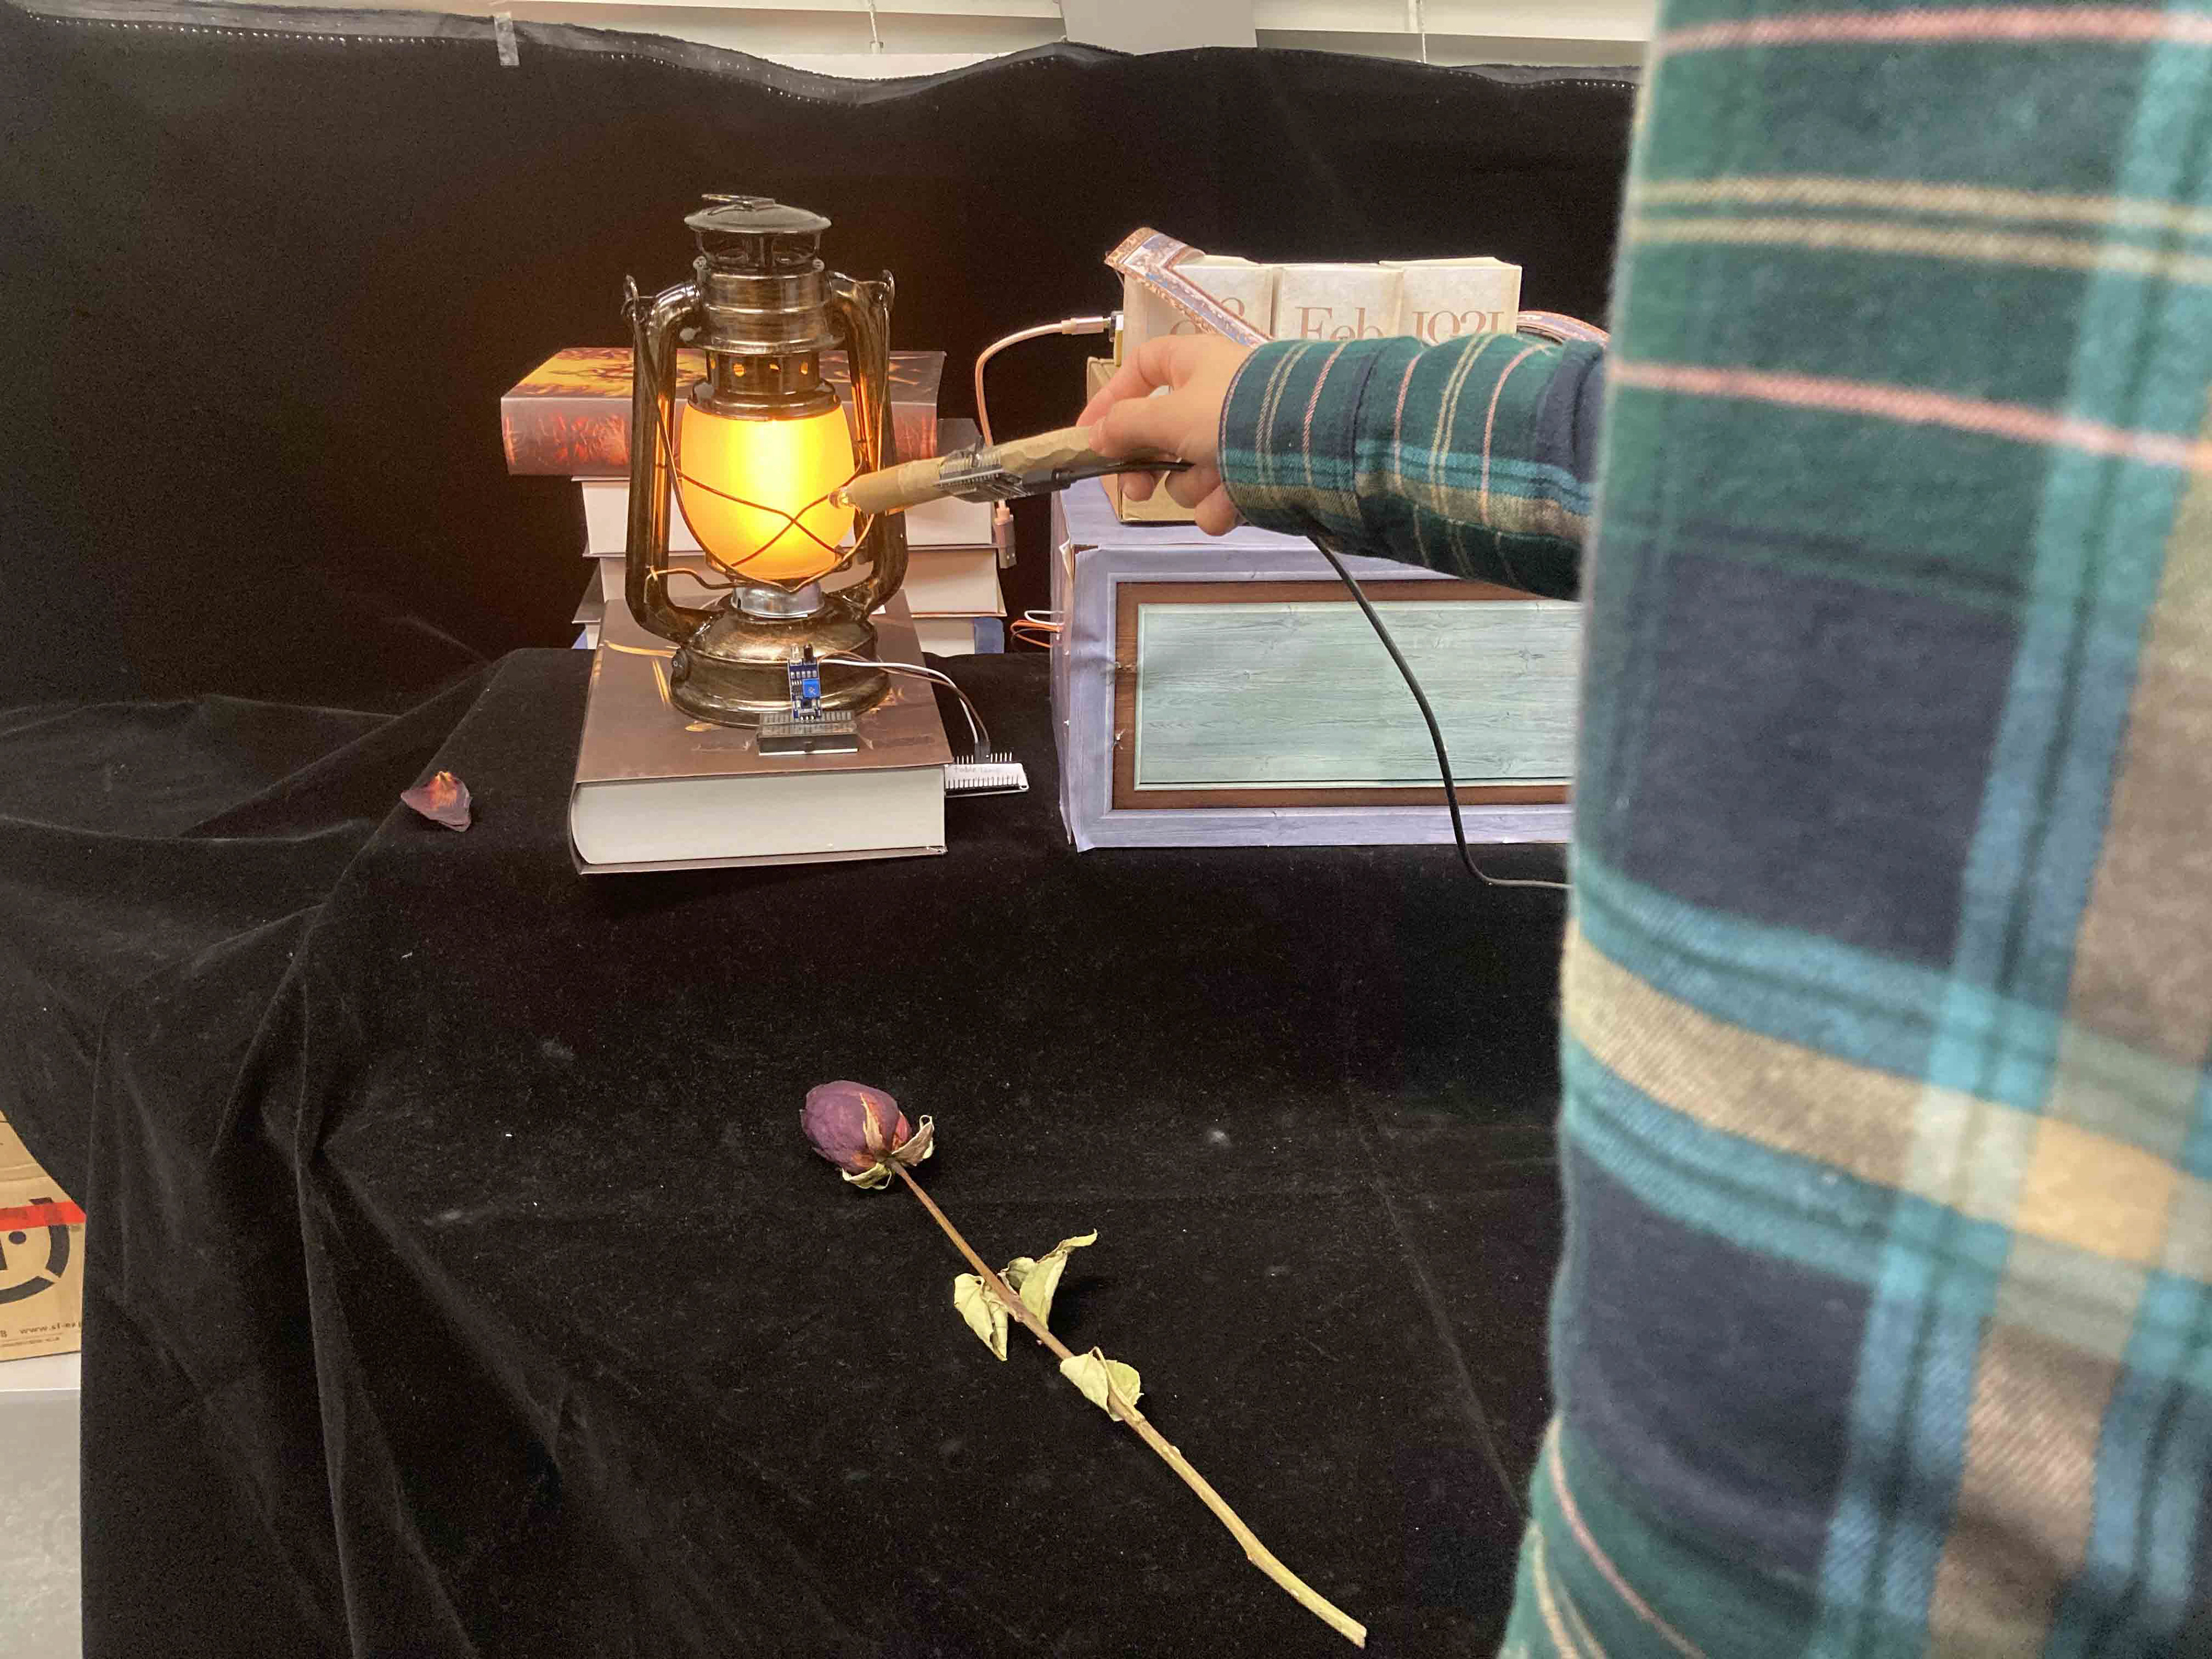
As using the wand is the beginning of a wizard's magic journey, the game starts with feeling the magic of using a wand by absorbing light. The player is expected to hold the wand and get close to the light source, and the wand tip will illuminate. Technically, the table lamp has one ESP8266 board and one IR sensor, while there is an ESP8266 board and a white LED on the wand. The input is the proximity that will trigger the LED’s fade-on effect.
It is noteworthy that in the game, the next game step will be unlocked until the previous stage has been successfully completed; that is, the corresponding hardware will not be ready to function until it receives a MQTT message.
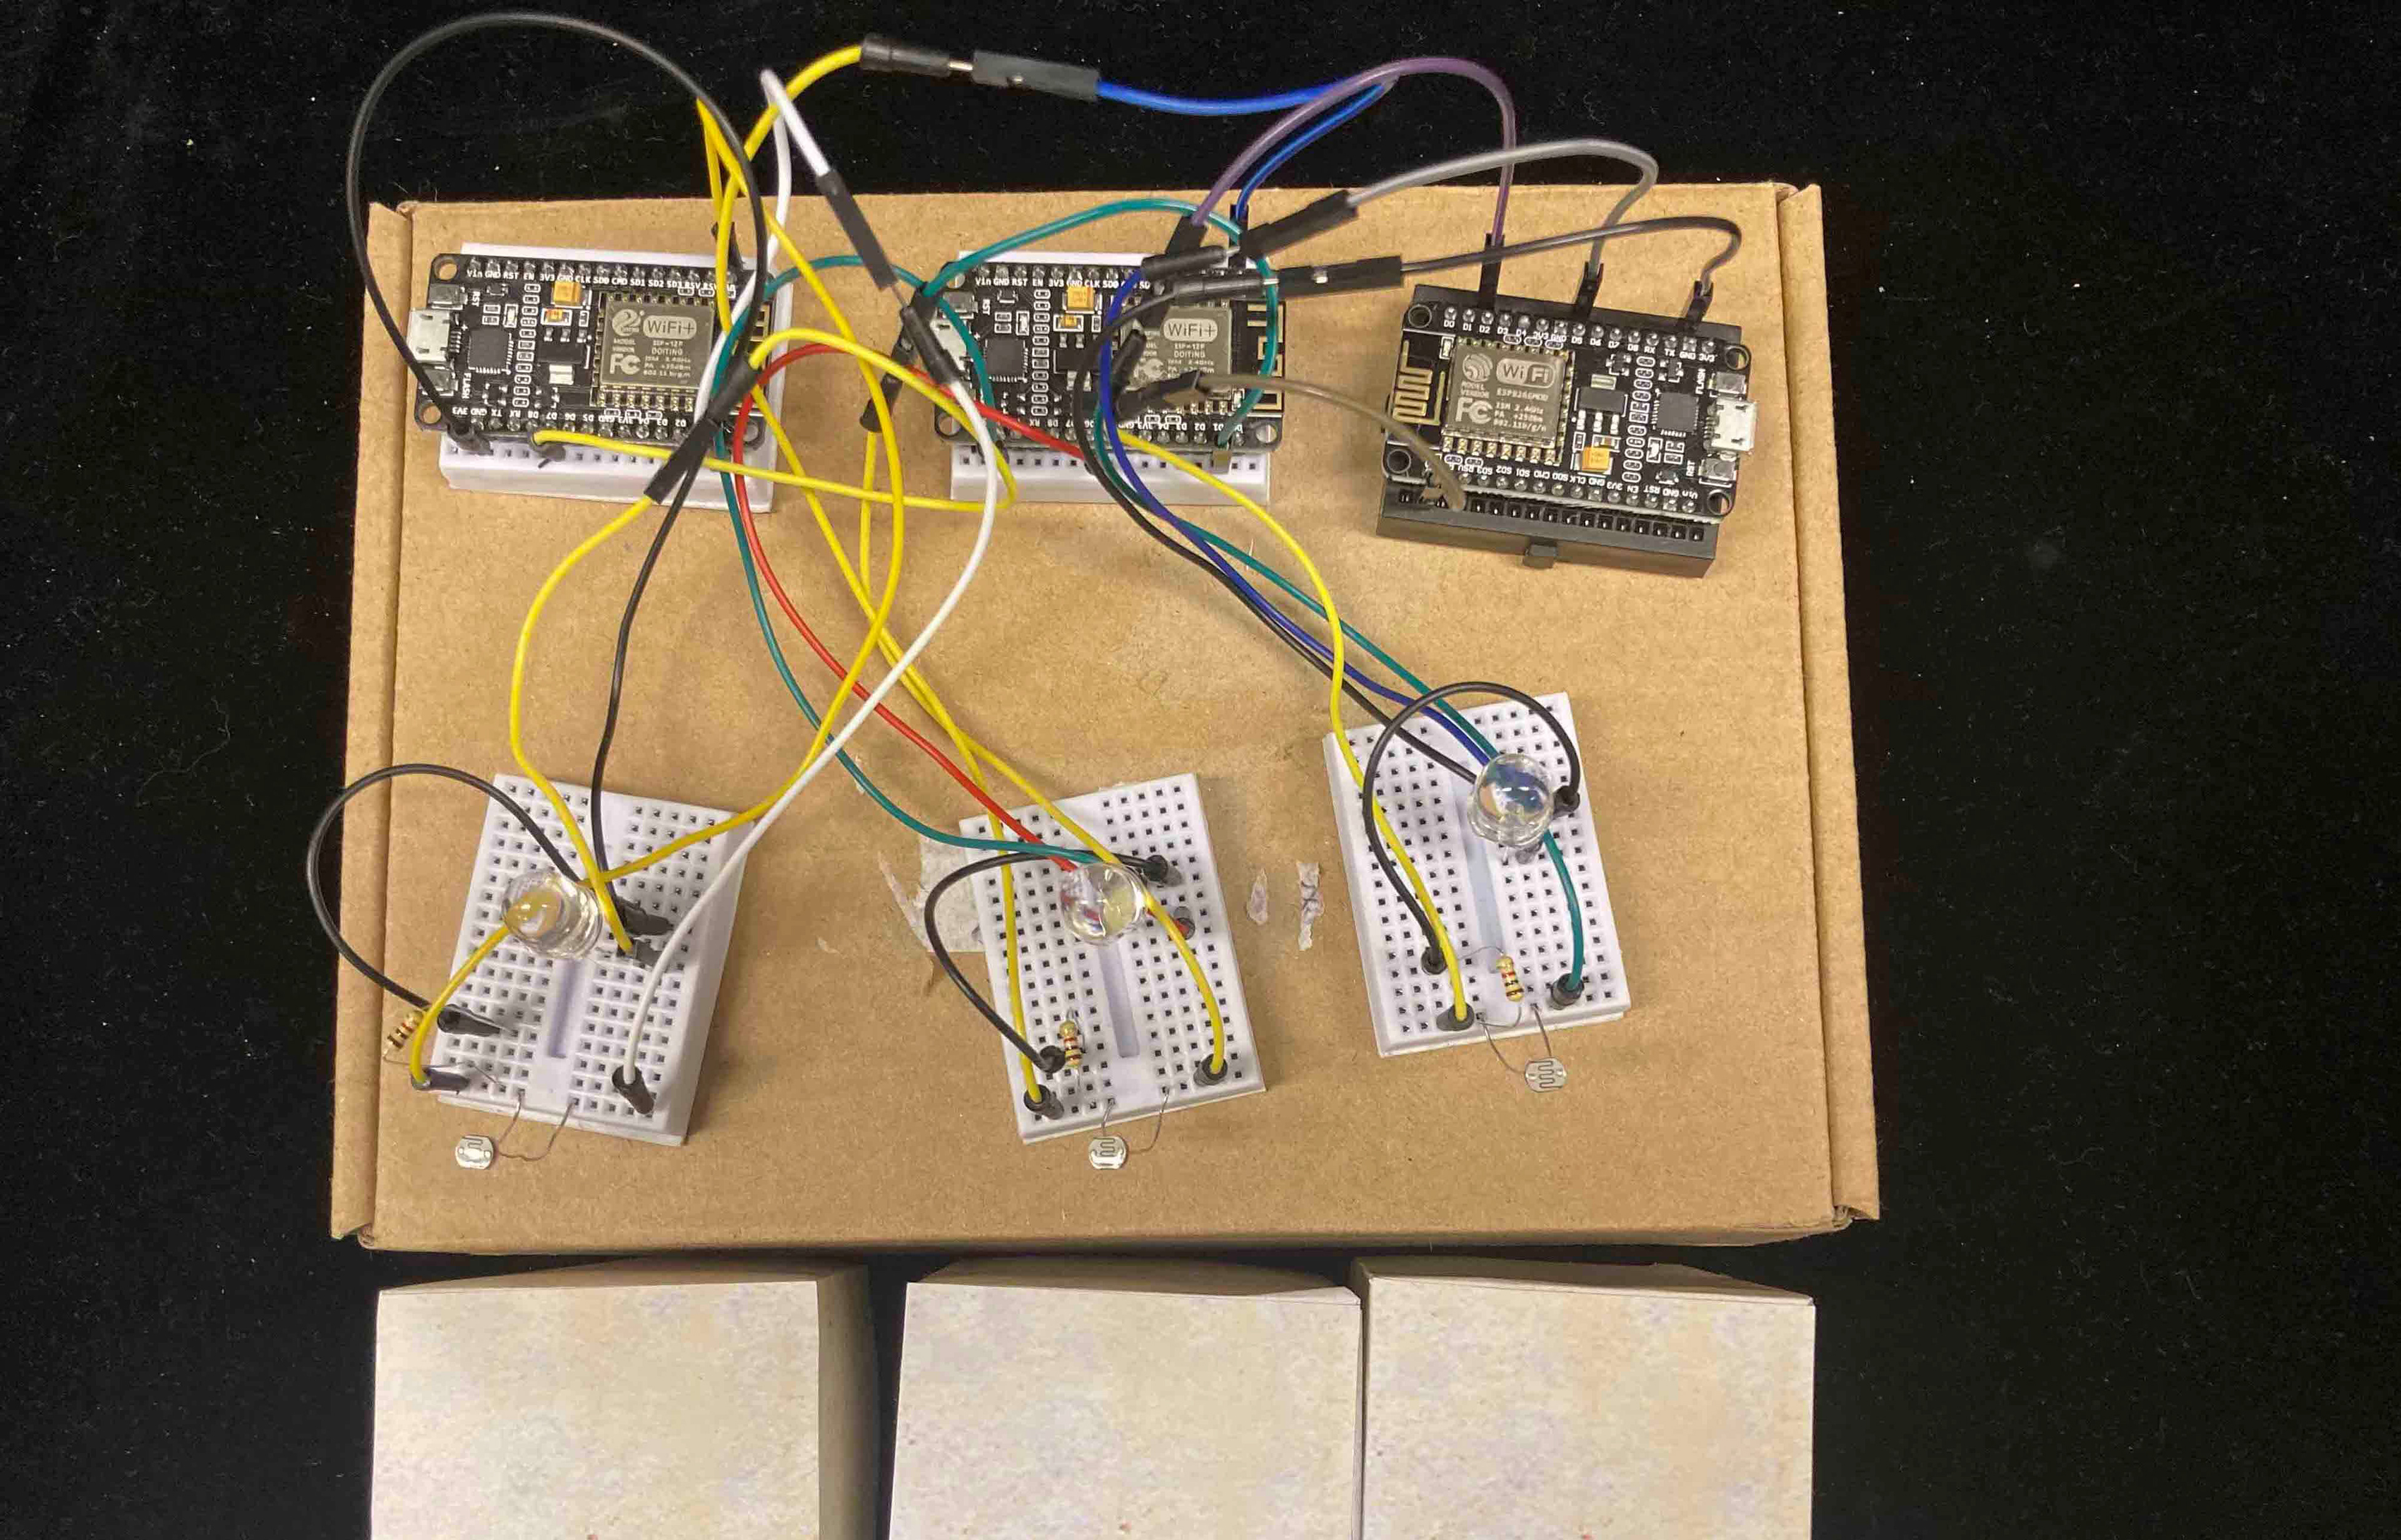
Game Stage2 - Illuminate Calendars and Find Hidden Clues
Players can utilize clues from props and stories and use the magic wand and spell to seek hidden answers step by step. In this game stage, the player is expected to use the wand tip light to illuminate calendars and reveal the hidden clue that guides the player to the next step. To achieve this, the photoresistors are used for sensing light and if they read values above 550, the LEDs inside the paper boxes will be turned on, so as to reveal the hidden information printed inside.
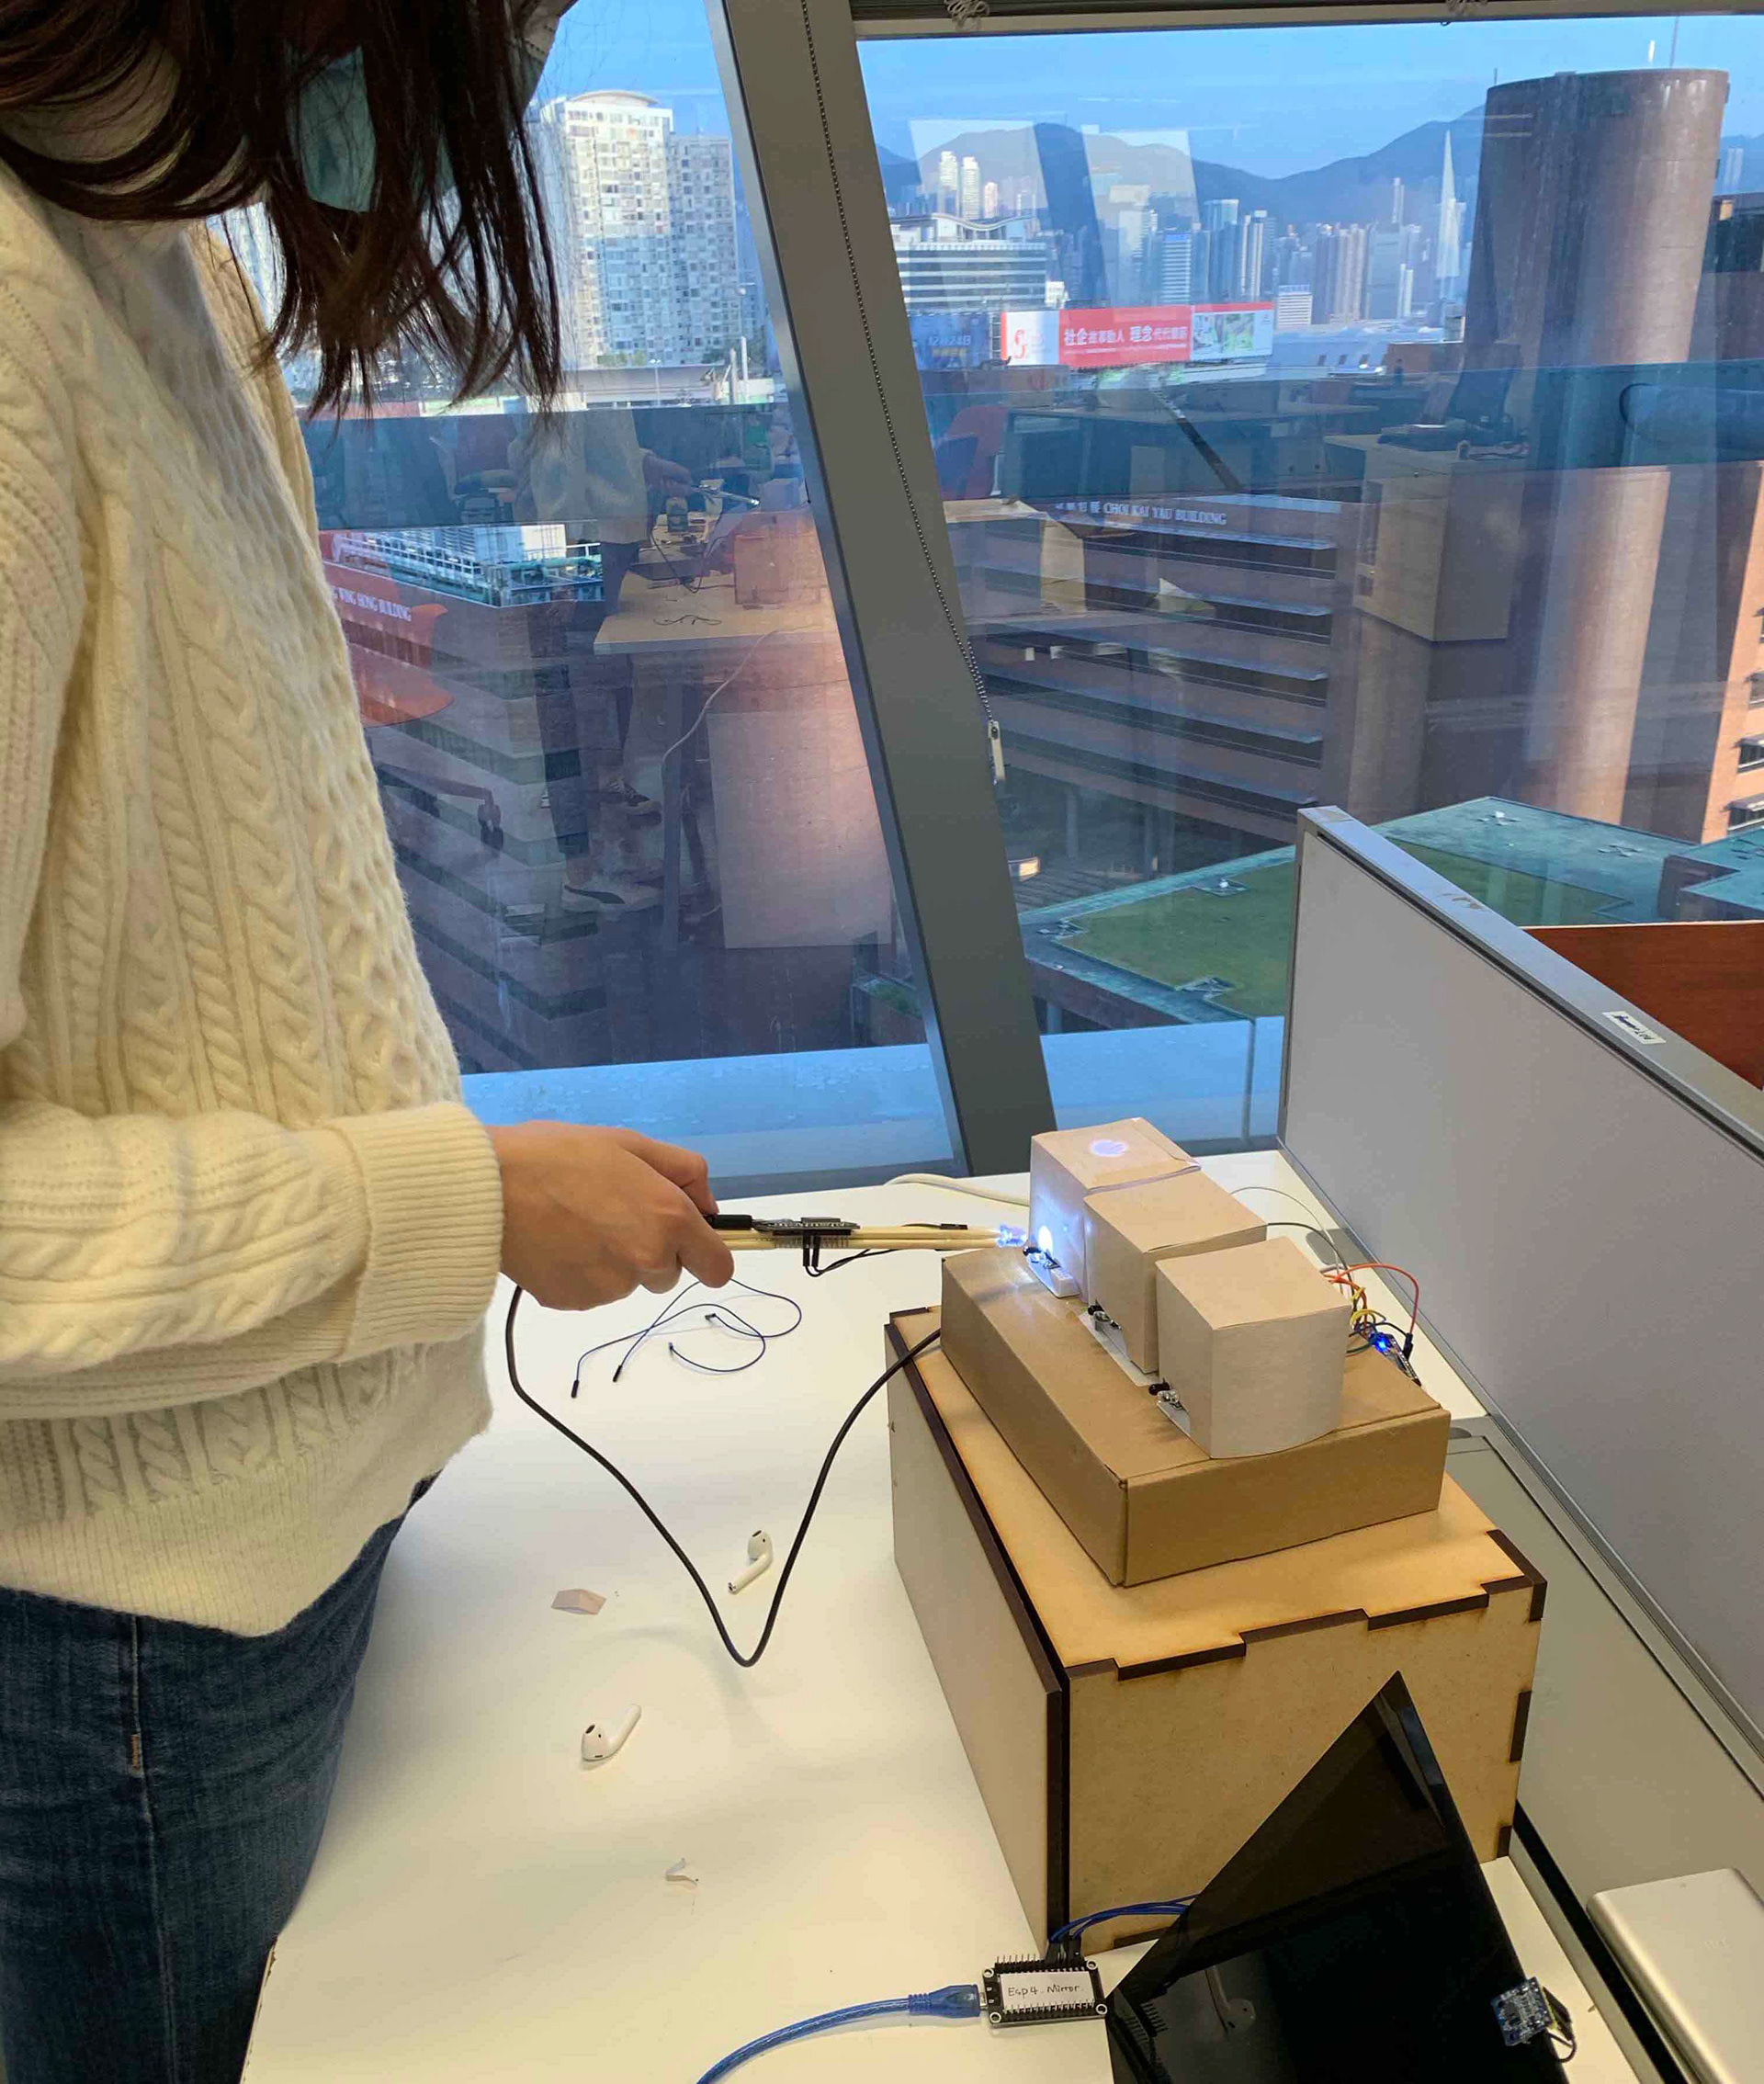
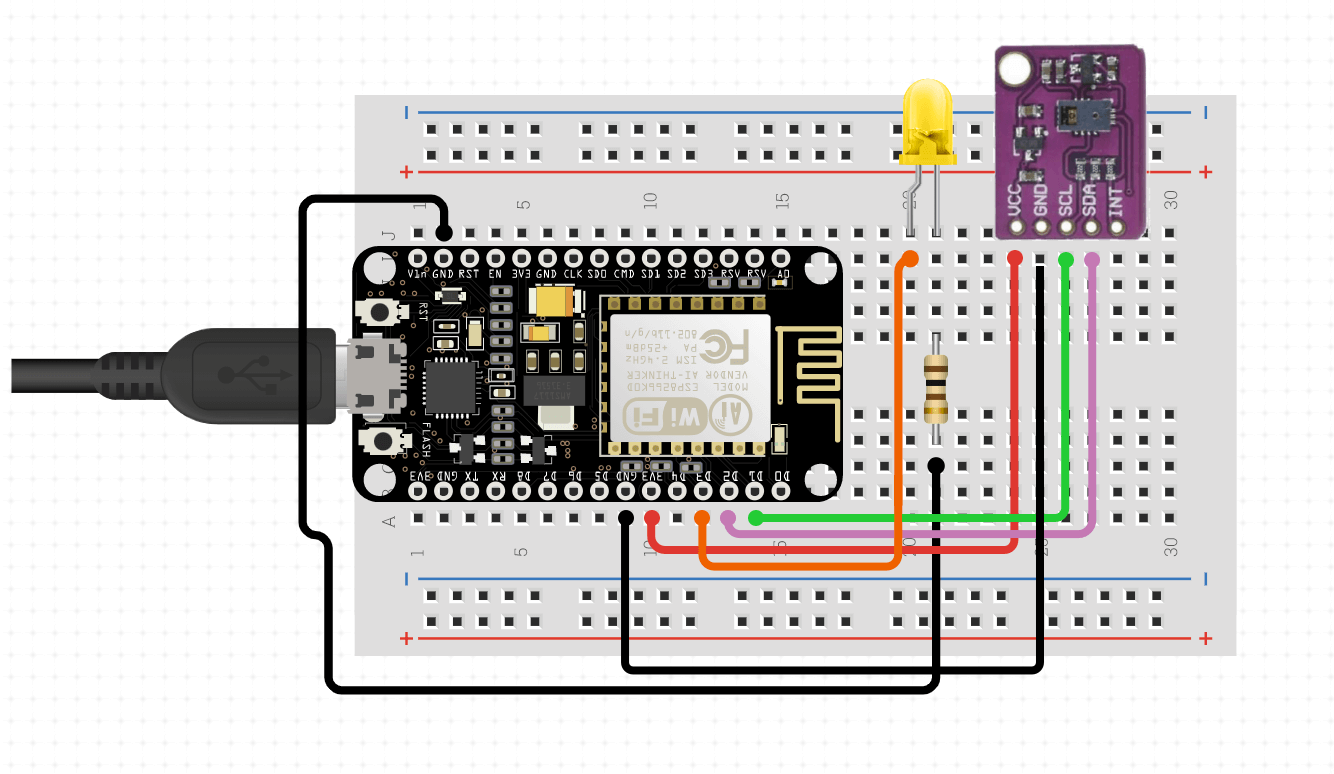
Game Stage3 - Reveal Spell on the Mirror
This stage requires users to use the right spell to reveal the hidden clue on a mirror, by waving the wand with the correct gesture and meanwhile speaking the right spell. When the stage has started, the sensor on the mirror will prepare to detect gestures and there is a LED fading on and off that reminds users where to interact. Meanwhile, the iFlyTek demo App will detect the player's voice and recognize whether the speech aligns with the preset correct spell. If the right spell has been performed, a clue will appear on the mirror (screen output achieved via Noodl).
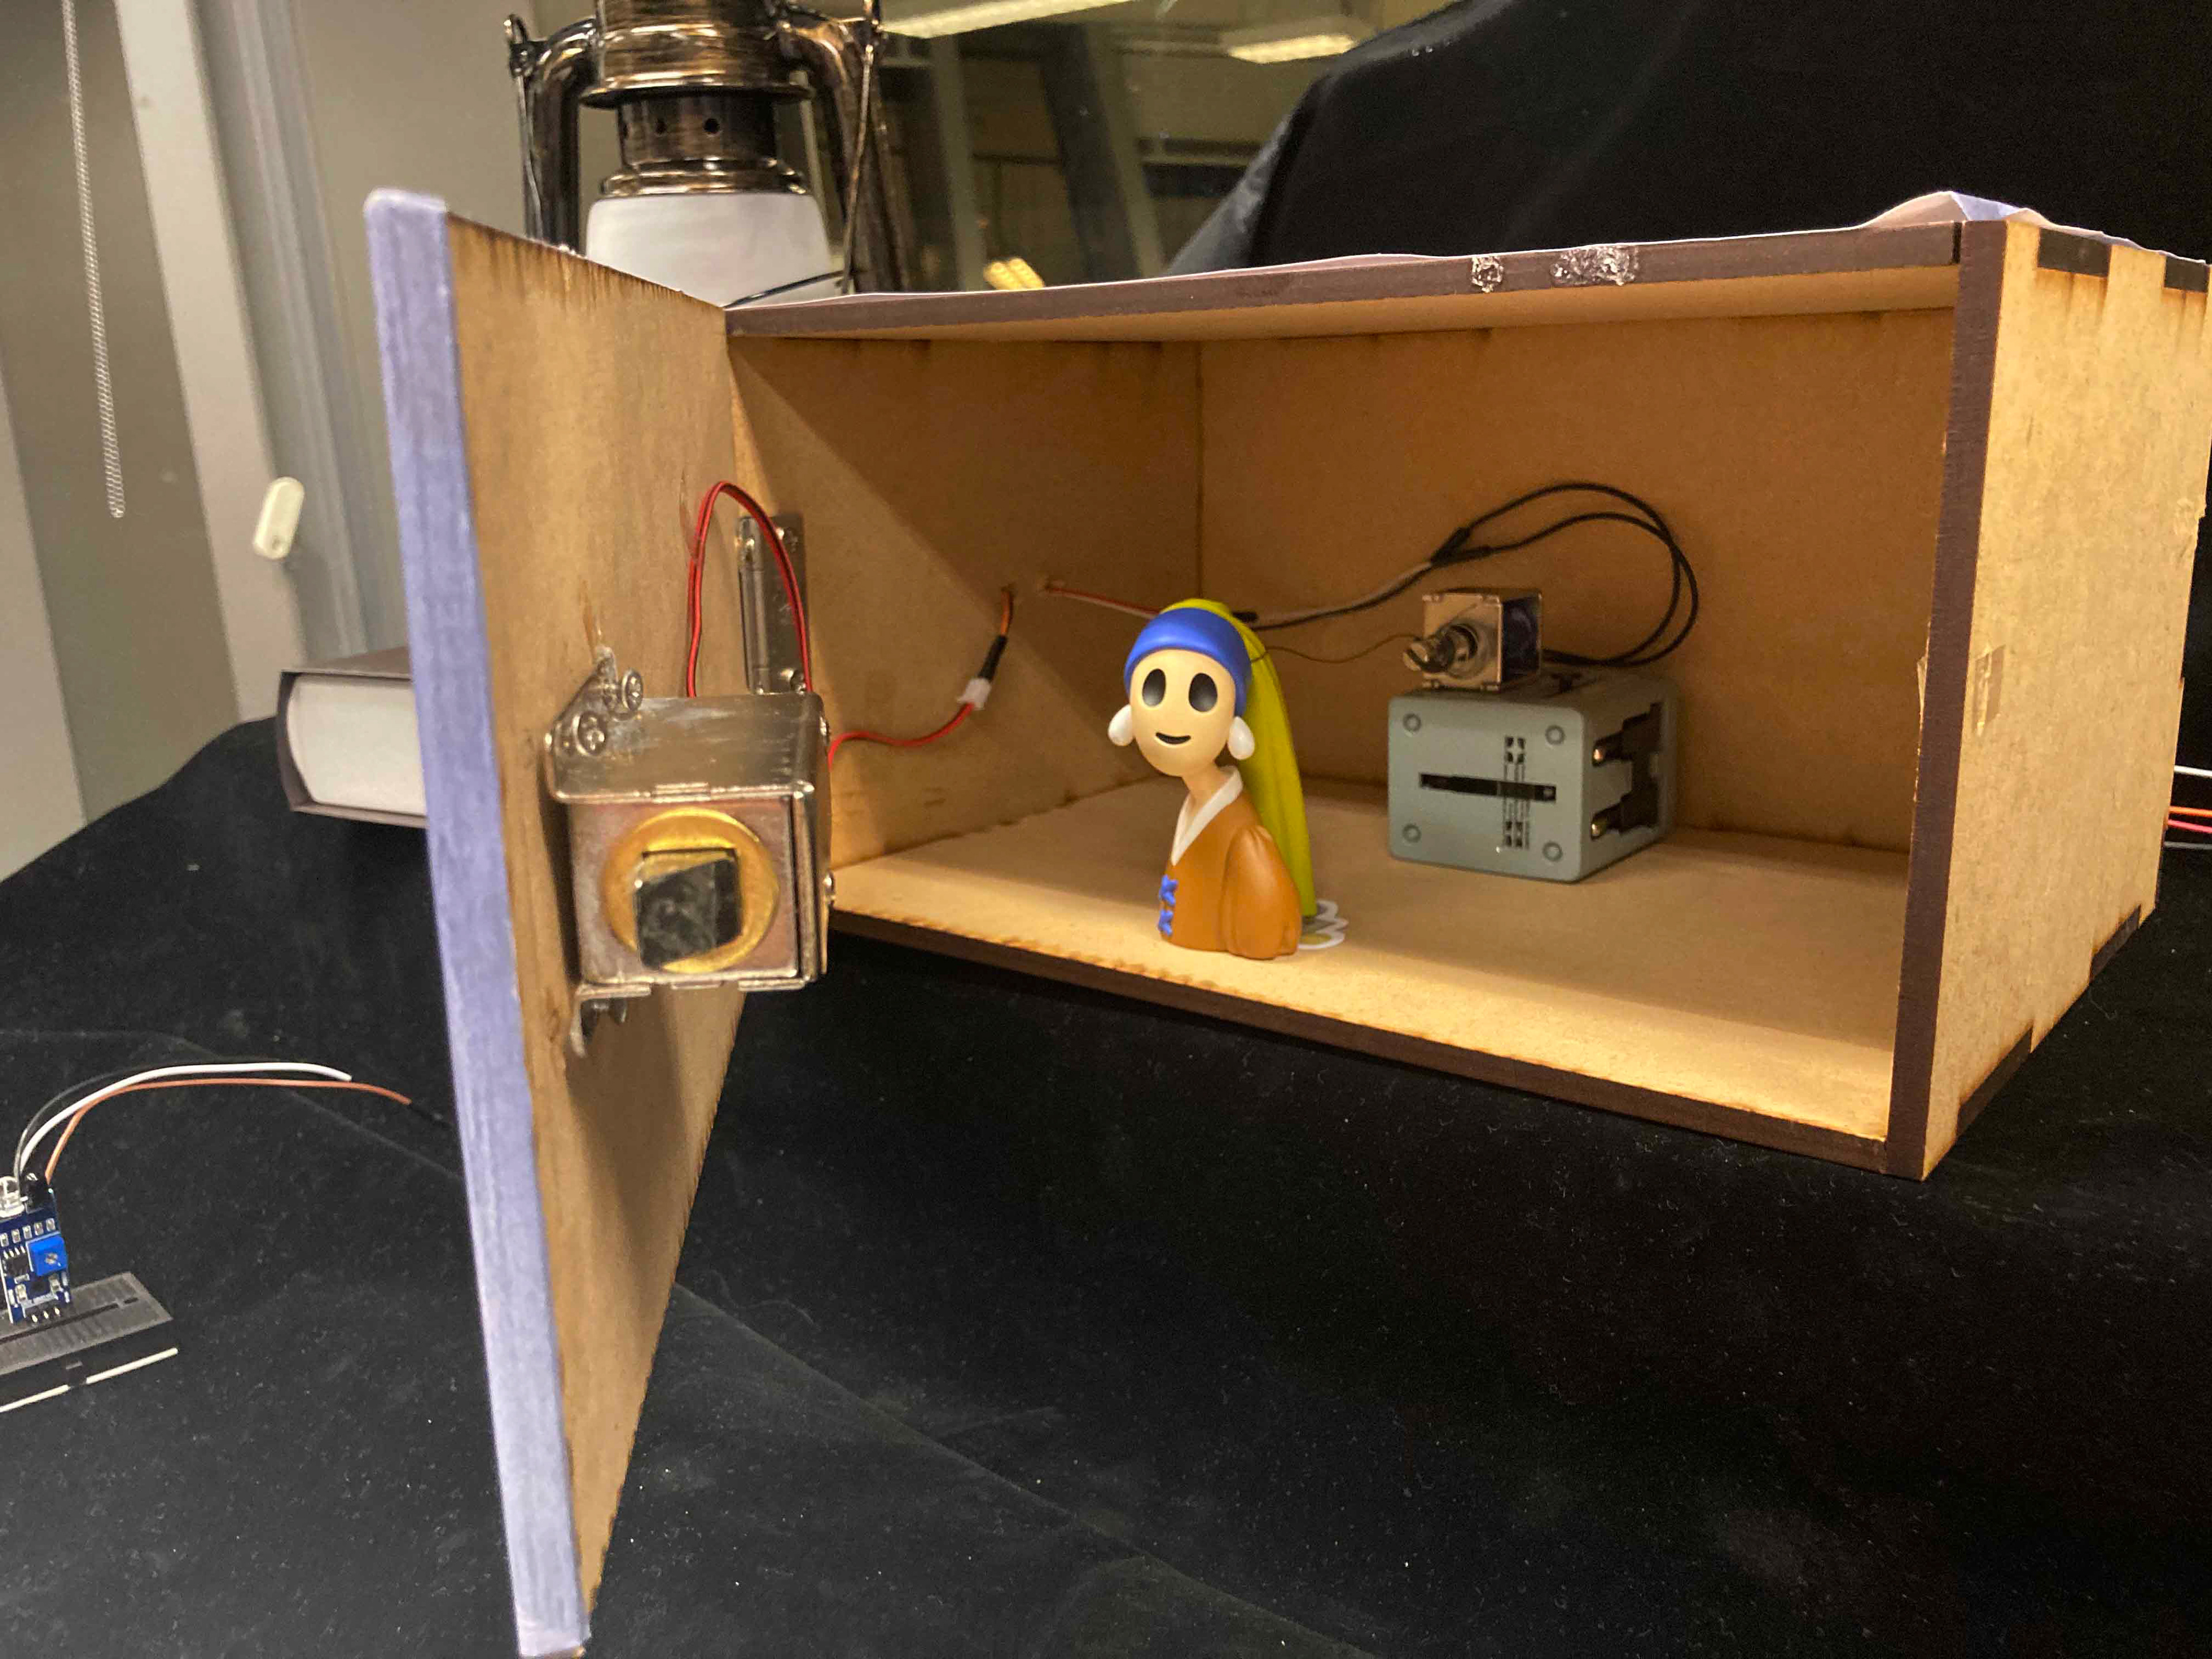
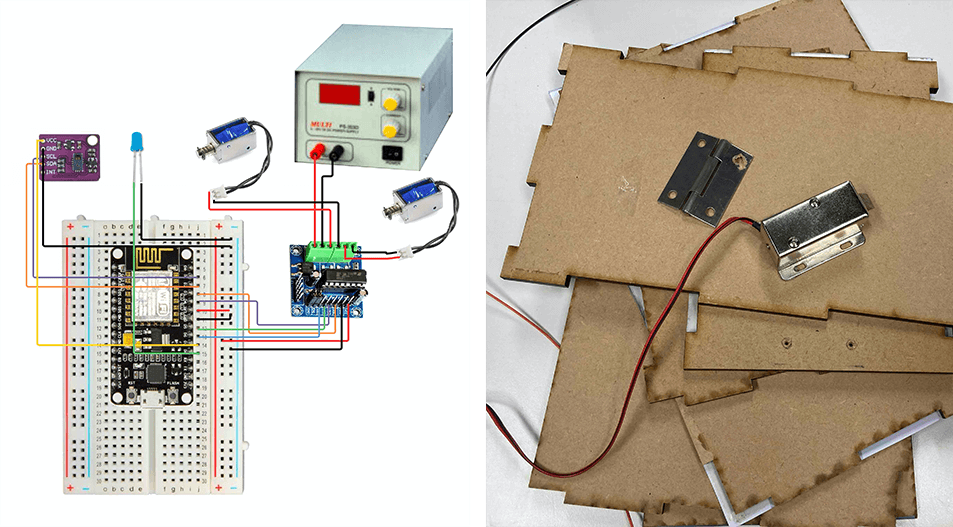
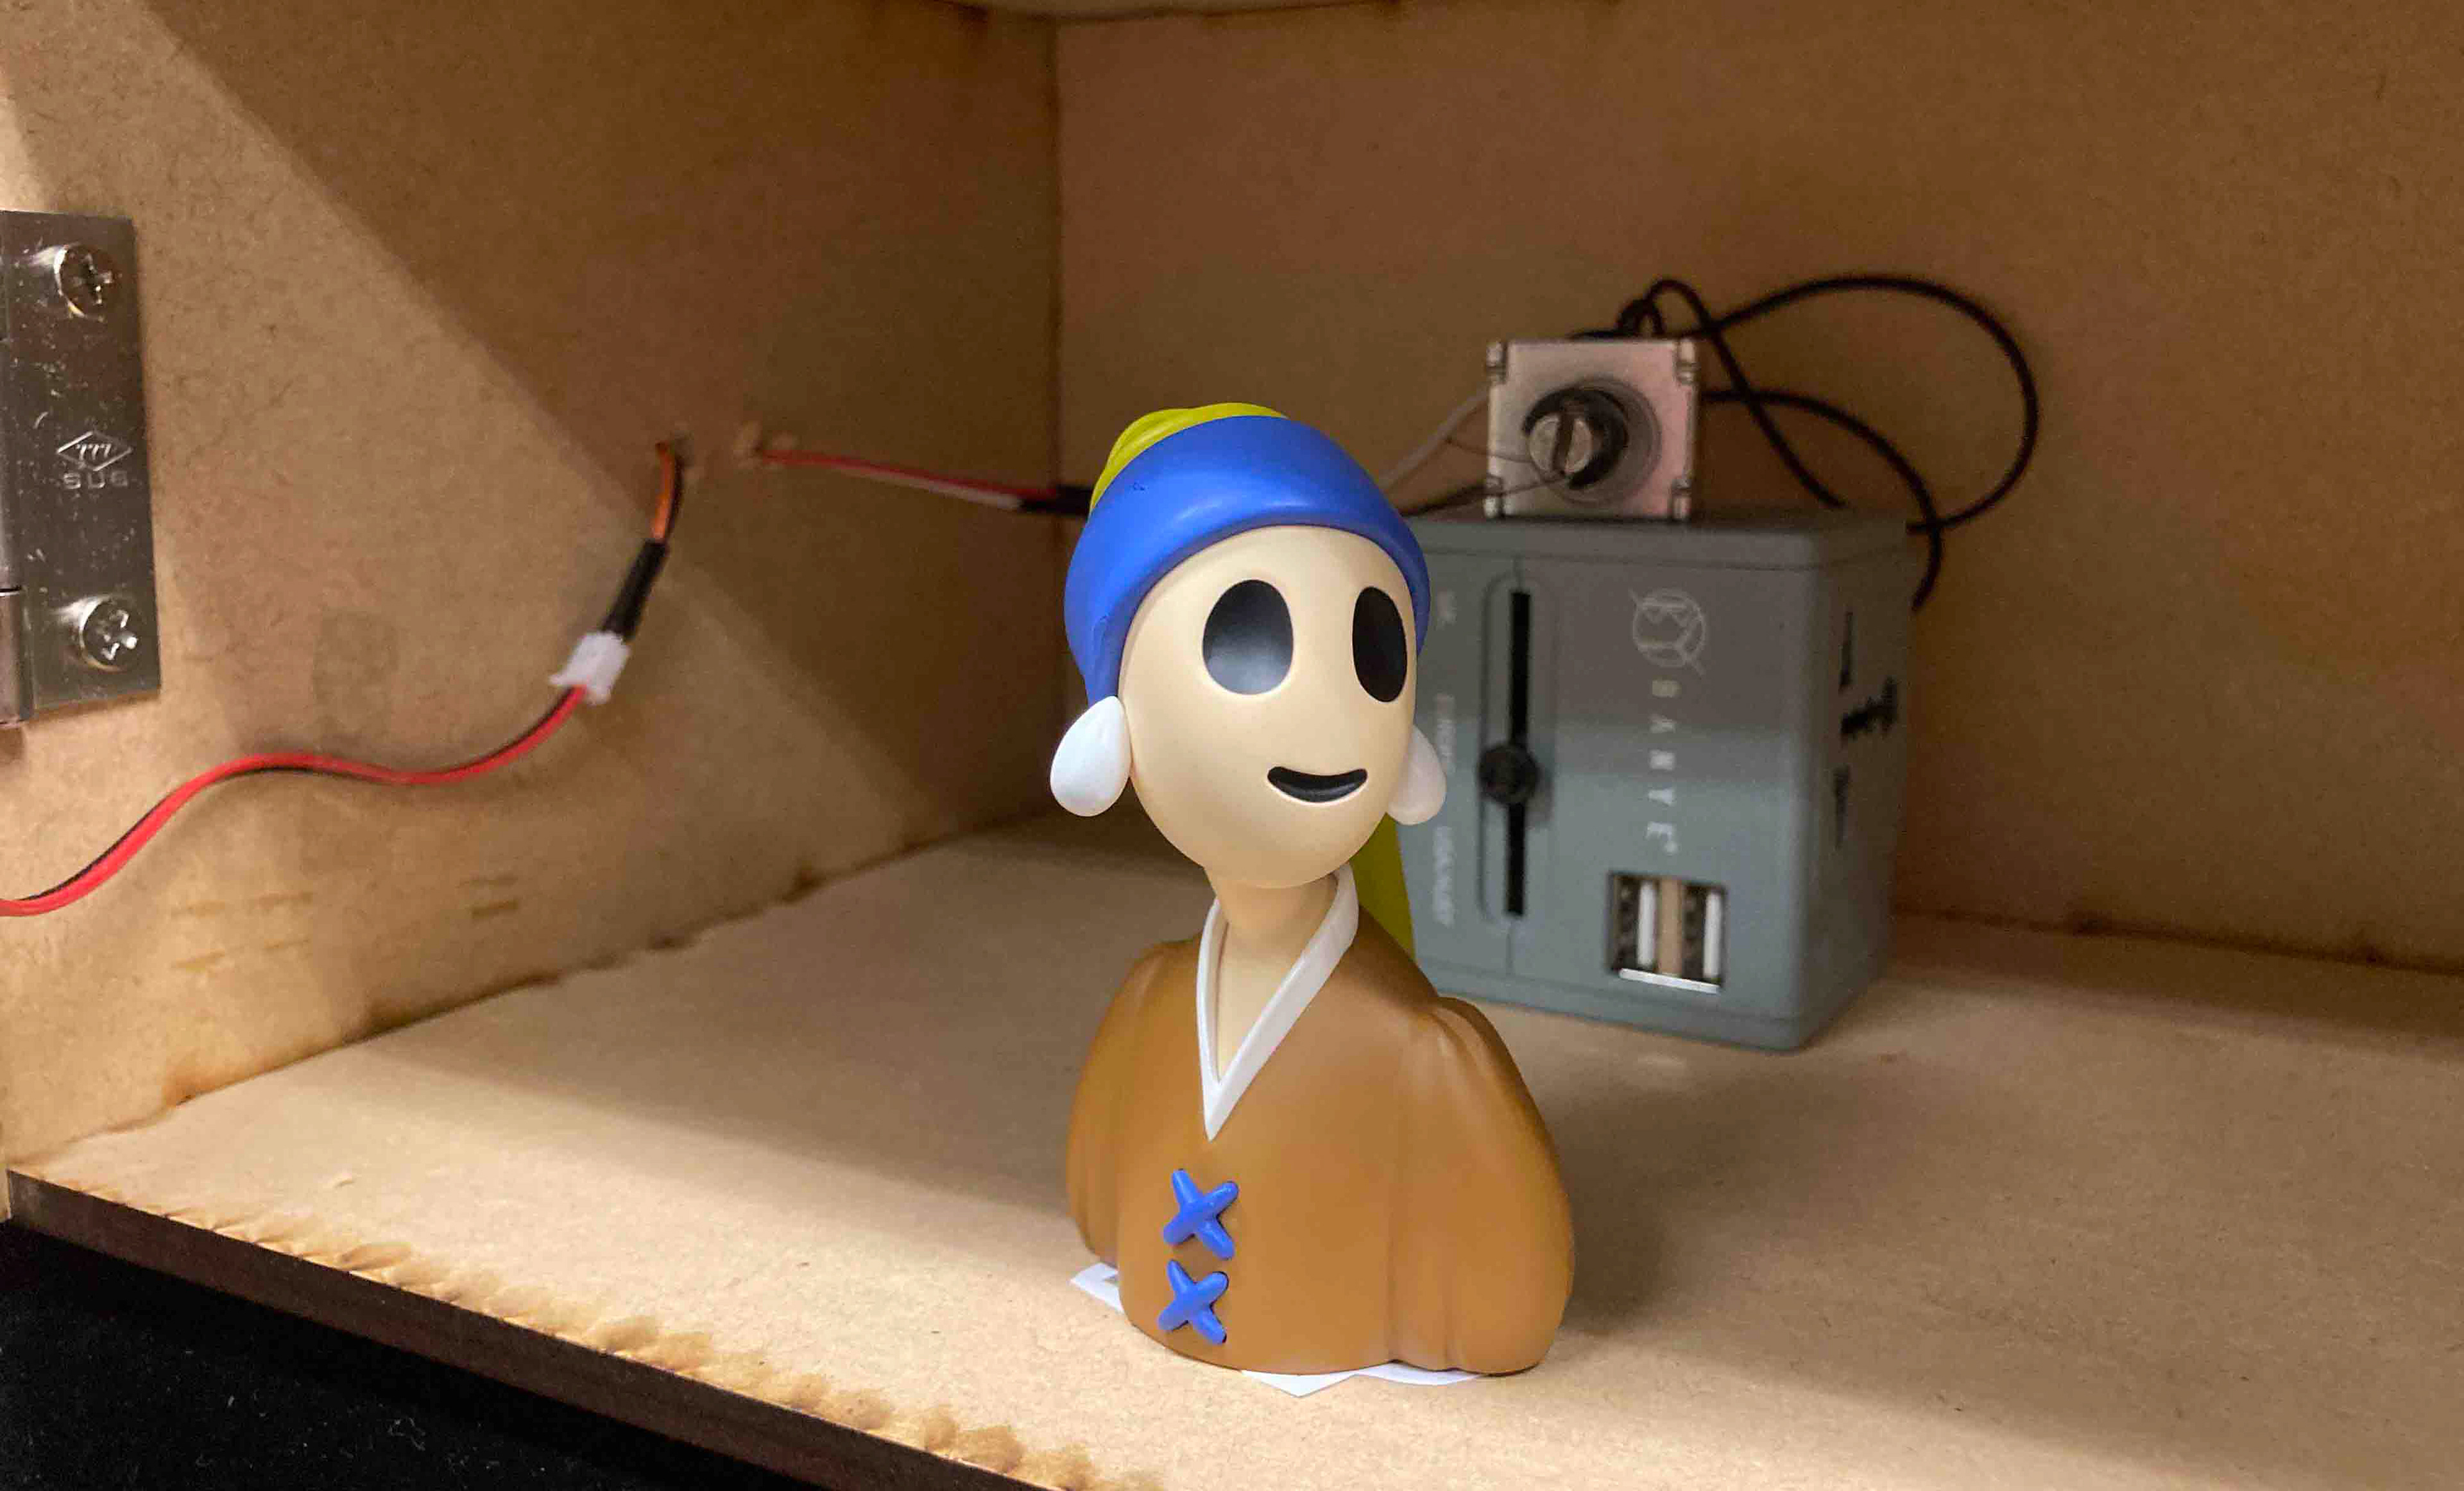
Game Stage4 & 5 - Unlock the Cabinet & Knock Down the Skull and Get the Puzzle
The clue on the mirror will guide the player to the cabinet. Similar to the previous stage, the cabinet will be unlocked when the right spell, including the gesture and the speech, has been performed. The cabinet was made by laser cutting and two solenoids are connected with an ESP8266, gesture sensor, LED, motor drive, and a power supply.
The components for stages 4 & 5 are linked together. After the cabinet door opened, the player will see a skull prop inside the box that is controlled by a string attached to a solenoid. Once the right spell has been performed, the skull will be knocked down and the clue under it will be revealed.
User Evaluation
The prototype has been evaluated by users for three rounds with task observations and post-survey.
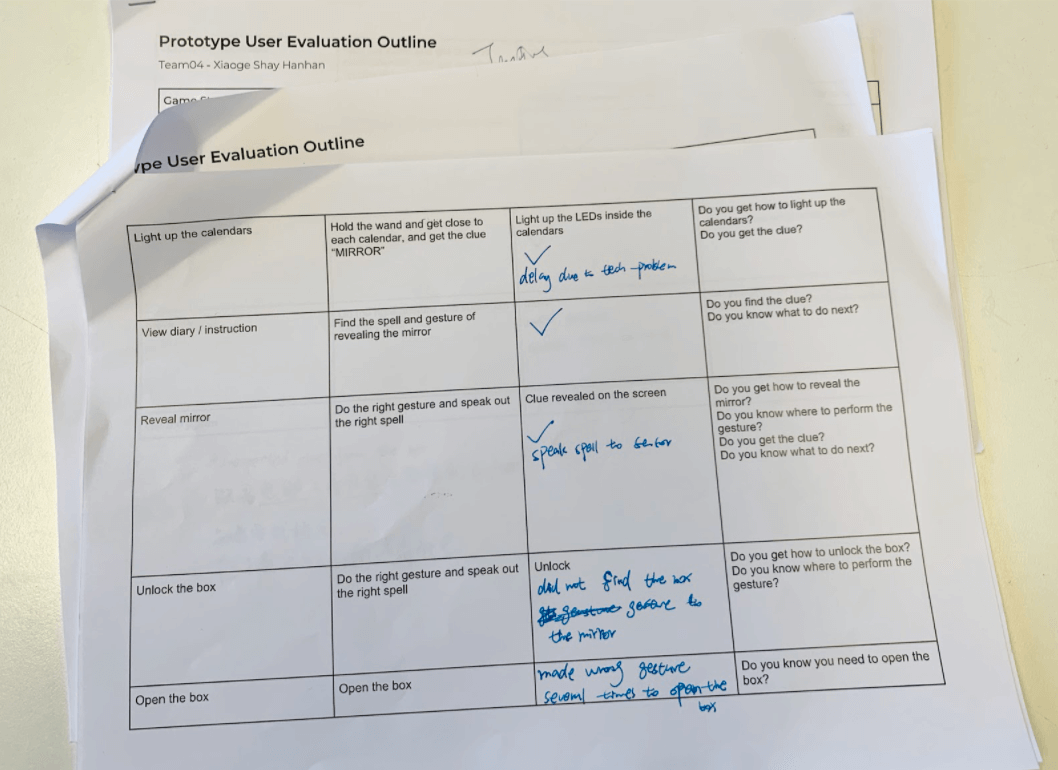
Iterations after the first round of testing:
1) Modify the assistive instructions, making hints for gestures and spells clearer;
2) Modify the dairy design, reducing words and highlighting the gesture and spell clues;
3) Add animation instructions for desired interactions.
Insights after testing:
1) More clear interaction feedback should be needed;
2) The feedback on props should be given so that users could get them immediately;
3) The fluent game flow could reduce user's difficulties in making decisions;
4) The balance between the difficulties and fun of puzzle games should be explored;
5) More considerations with the physical aspects like the friction and tension between props and solenoids.
The Walkthrough Video
Individual Contribution:
Ideation, Game Design, Key Visuals Design, Technical Explorations and Execution (programming, hardware and sensors, the voice recognition app, backend game controller, MQTT communication)